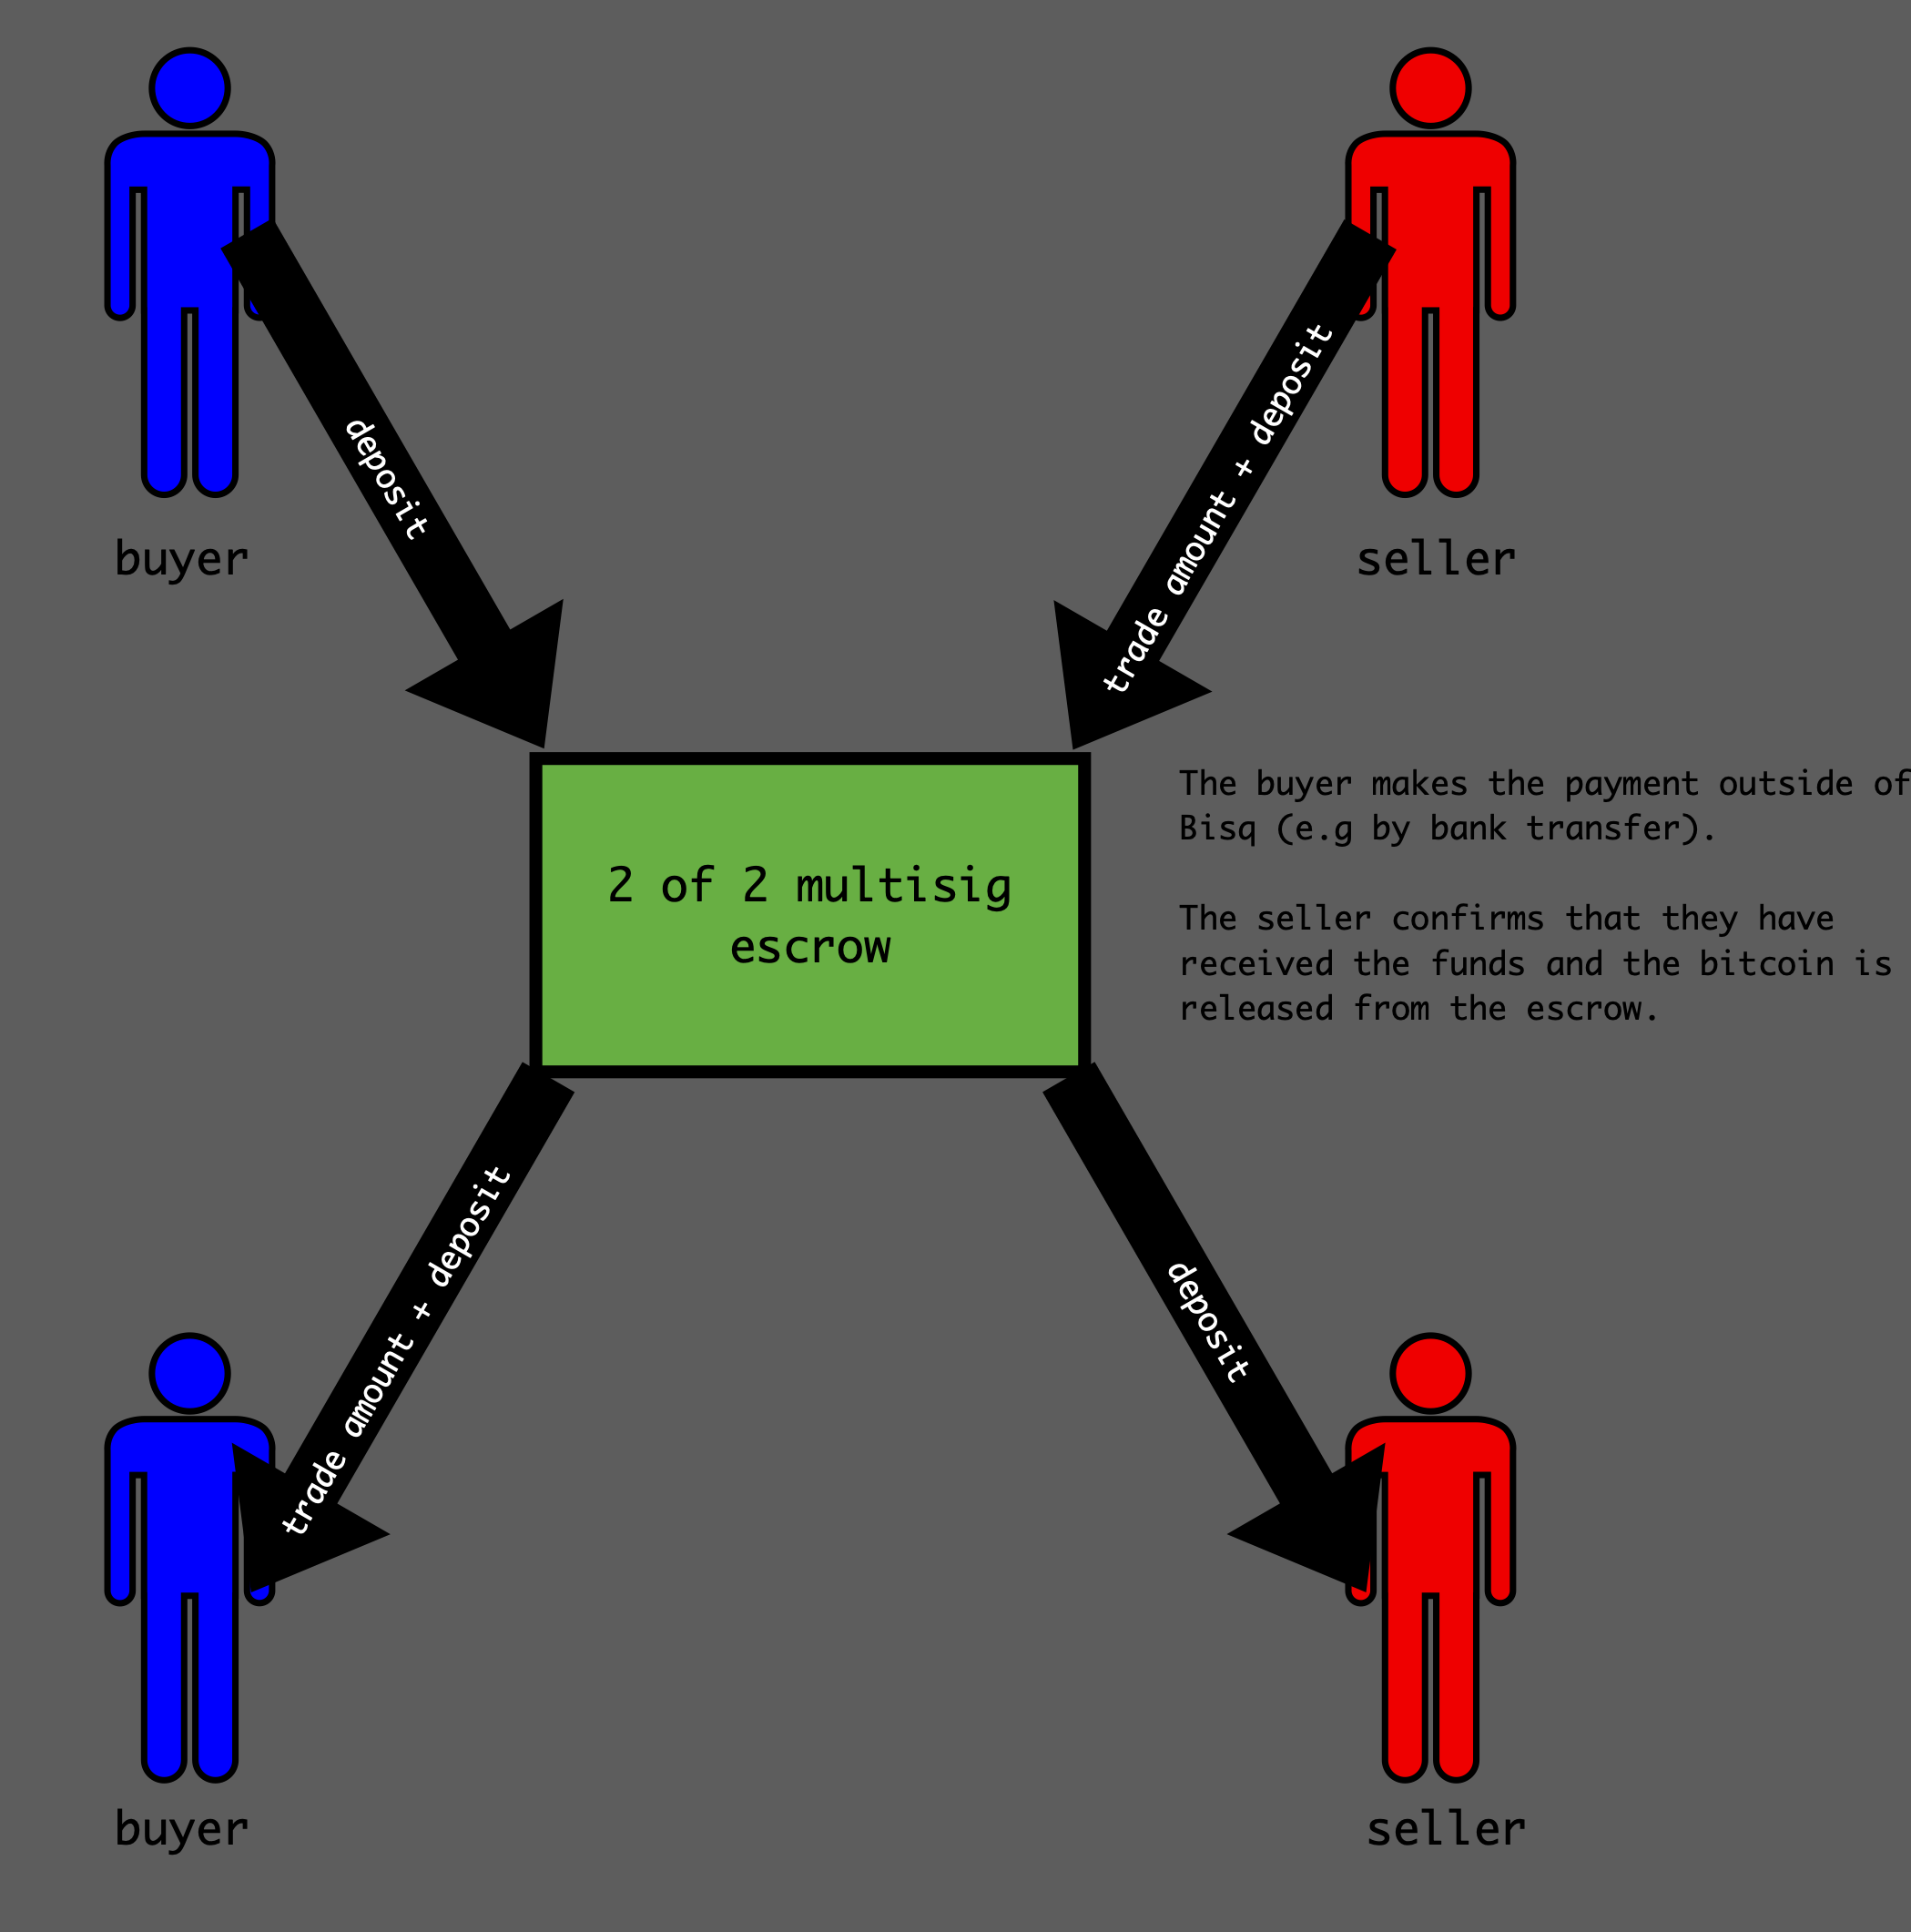
During a trade both parties have to pay a security deposit (this ensures everyone acts honestly), all trade funds (deposits, trade amount and fees) are sent to a 2 of 2 multisig escrow with each party holding one of the keys, this means in order to move bitcoin from this multisig both parties need to sign the transaction i.e both parties need to agree on the payout of the trade. A signed transaction which sends all funds in the multisig to the Bisq donation address is signed which can only be published after 20 days for fiat trades.
If a trade isn't going as it should you can message your counter-party and if things don't get resolved before the end of the trade period (1 day for Faster Payments) a mediator will suggest a payout, and if things still aren't resolved you can publish the time-locked transaction and go to arbitration. More on dispute resolution can be found here.
Bisq is a P2P (peer to peer) decentralized exchange, this means when you buy or sell bitcoin you interact directly with the person on the other side of the trade. The main benefit of this in my mind is privacy: you do not need to go through any KYC (know your customer) as you would with centralized exchanges such as coinbase or binance and all of your personal data is stored locally on your own computer. Another plus is security, you always hold your own keys so you are not exposed to exchange hacks.
Why is bitcoin privacy important? Firstly because it involves sensitive financial information but especially because transactions are stored in a public and immutable ledger. Anyone with an internet connection can see the inputs, outputs and the amounts of any onchain transaction, (a great reason to use off chain layer 2 solutions like lightning or liquid) and while this ledger is pseudonymous, when paired with data from KYC exchanges, companies like chainalysis can track your bitcoin transactions.
If you believe in bitcoin you should expect this ledger to outlive you. So if you mess up your onchain privacy there is nothing you can do to undo your mistake (you can use coinjoin to get forward privacy however). What if your government decides to seize bitcoins? While the digital nature of bitcoin can make it very hard to seize if secured properly, no one wants to be on the run from a powerful entity such as a government. This might sound very far-fetched and will hopefully never happen in your lifetime, but what about your heirs' lifetime?
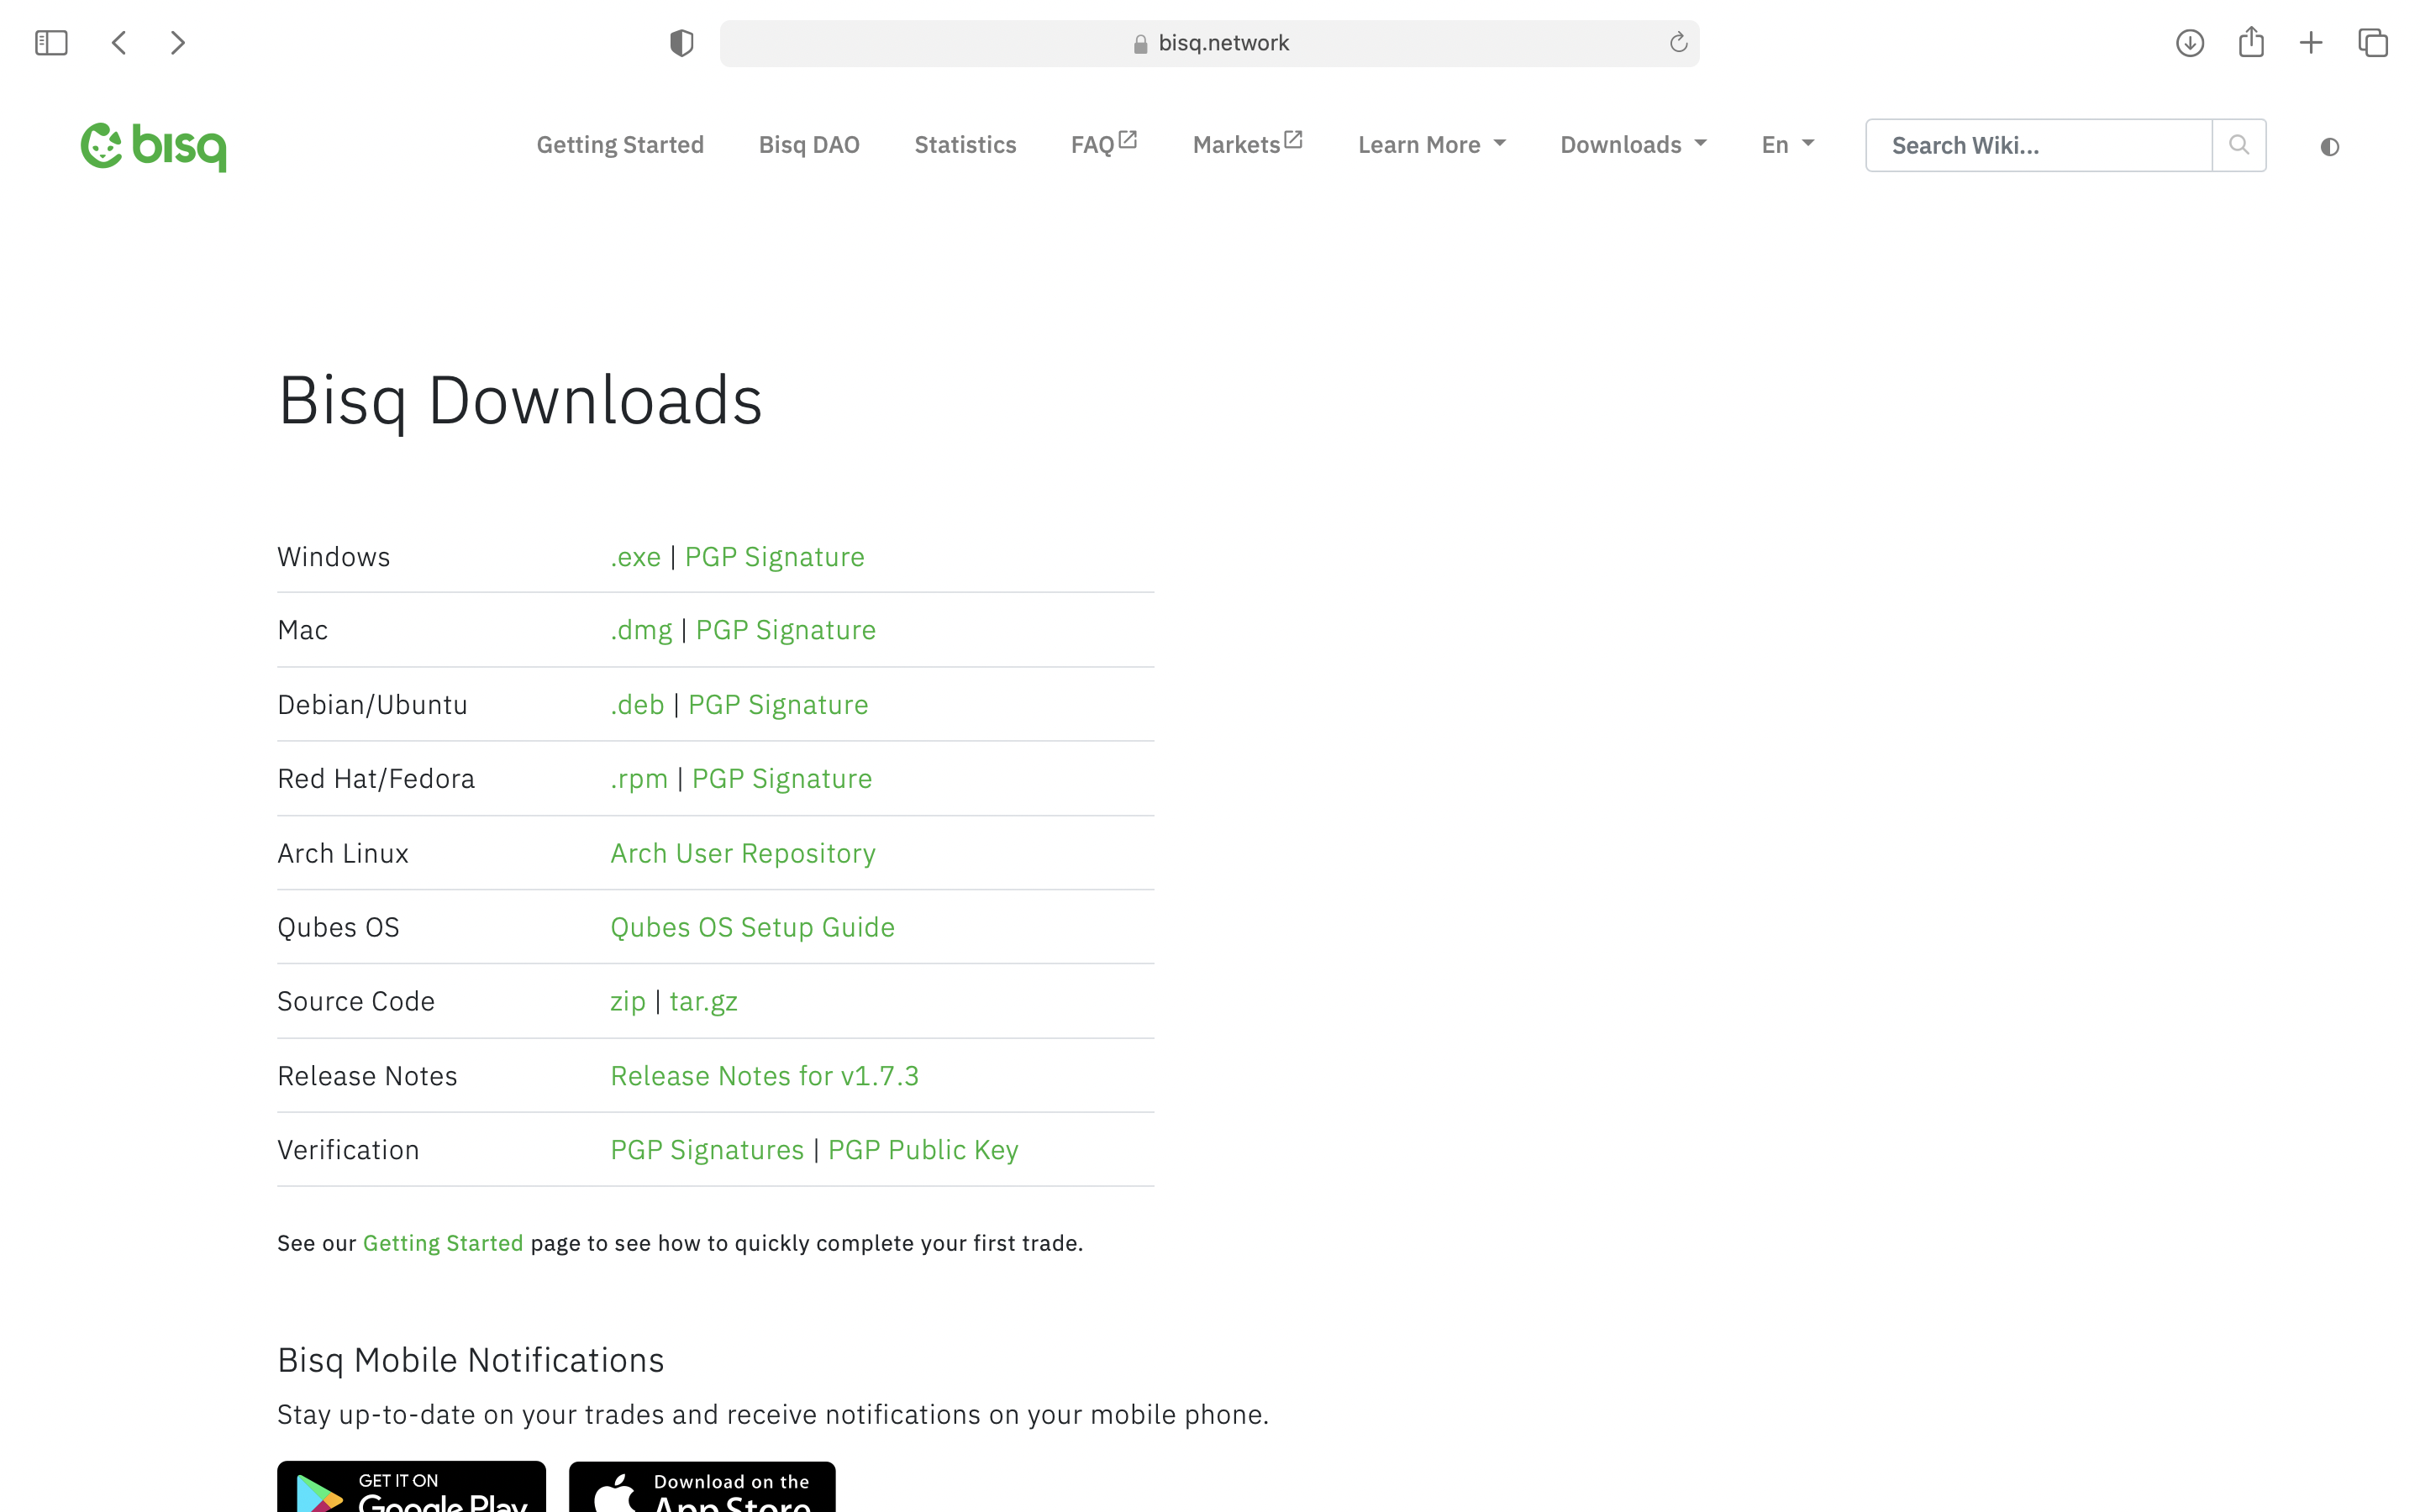
First go to https://bisq.network/downloads/ and download the corresponding files for your computer, this guide was done on a mac so I'll download the .dmg file and the corresponding PGP signature.
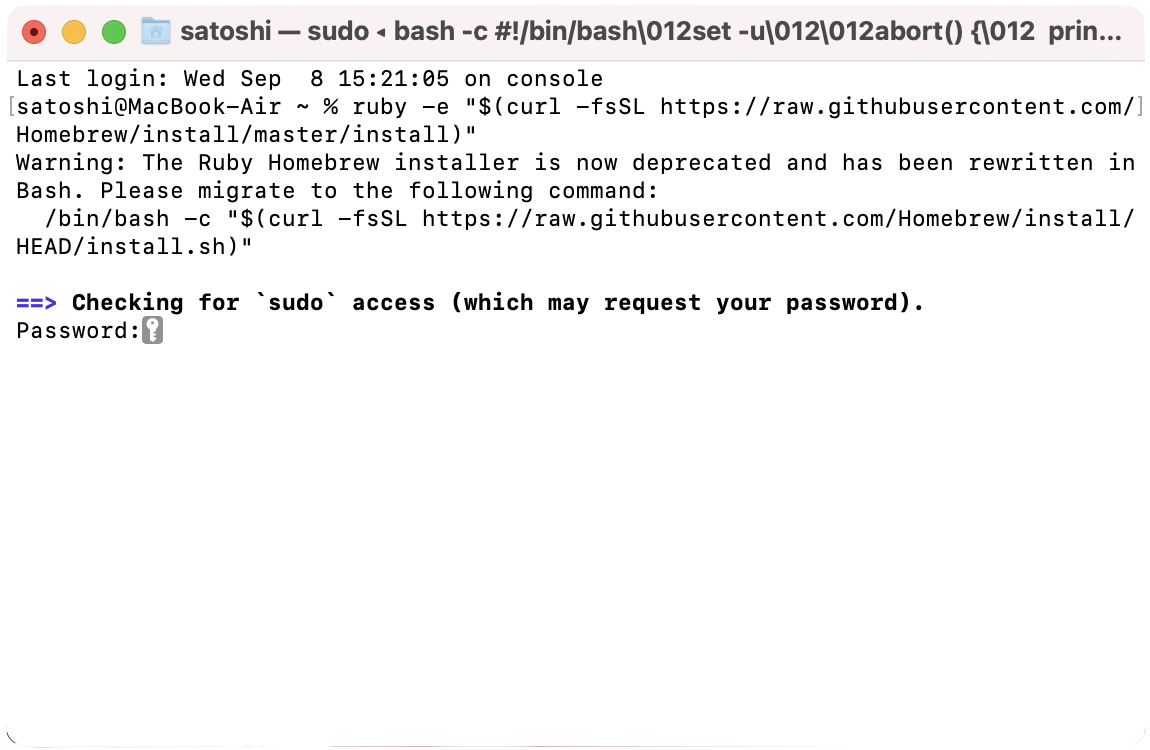
The next few steps are to ensure that the .dmg file is authentic. Open the terminal app and run (copy and paste the following line into the terminal window and hit enter)
ruby -e "$(curl -fsSL https://raw.githubusercontent.com/Homebrew/install/master/install)"
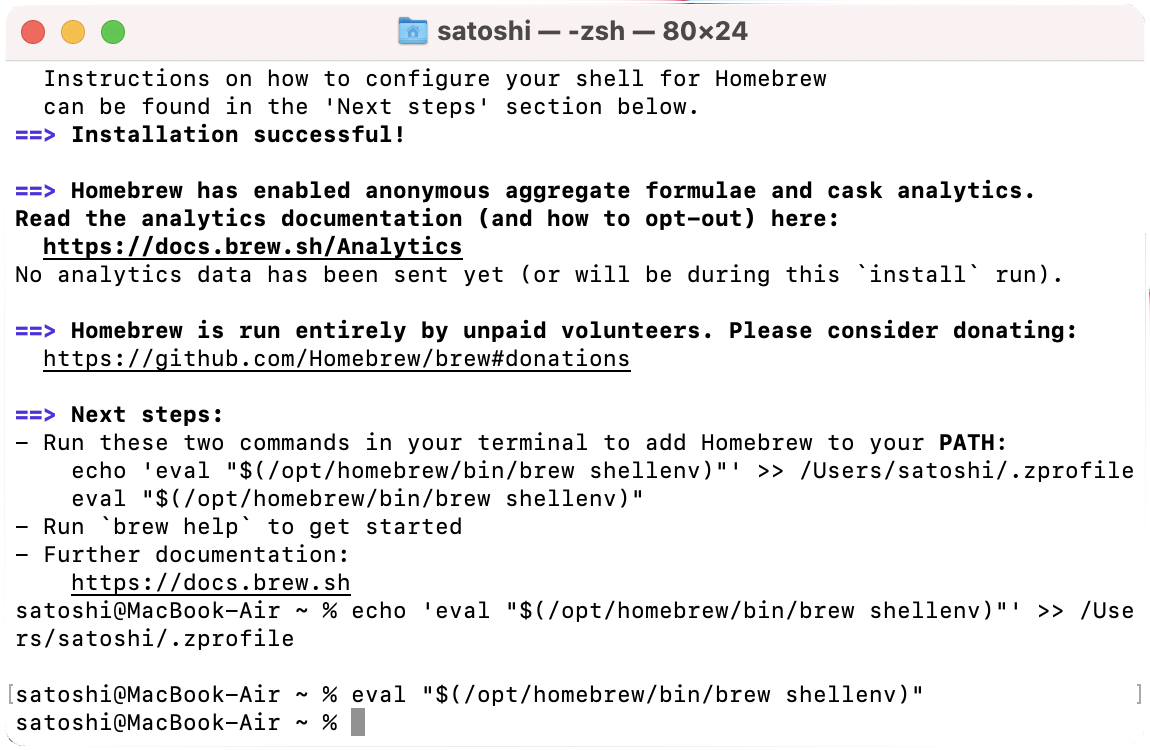
hit enter, type your password if prompted and wait for homebrew to install.
If you get the warning message /opt/homebrew/bin is not in your path follow the instructions under "Next steps". Then run the two lines separately
brew install gnupg
curl https://bisq.network/pubkey/29CDFD3B.asc | gpg --import
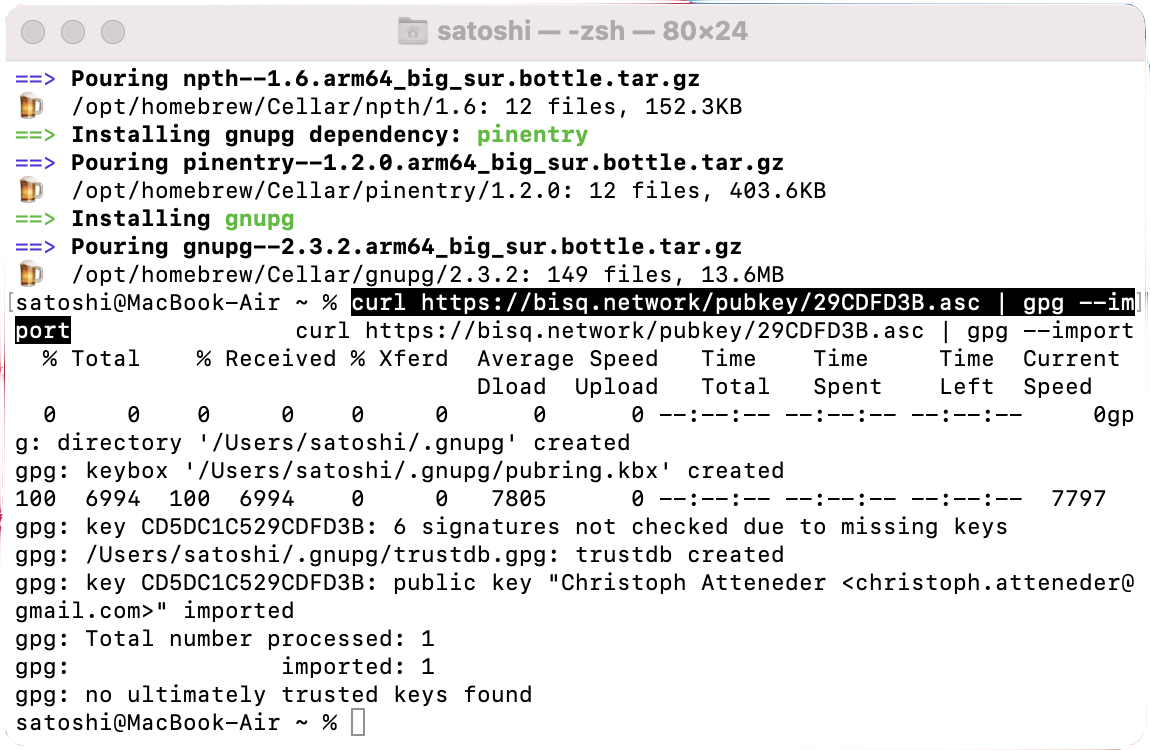
The previous command imports the public key of Christoph Attender (ripcurlx). His public key ID is 29CDFD3B and fingerprint is CB36 D7D2 EBB2 E35D 9B75 500B CD5D C1C5 29CD FD3B, which you can verify through commits on github and on keybase, now run
cd Downloads
gpg --digest-algo SHA256 --verify Bisq-1.7.3.dmg.asc
replacing Bisq-1.7.3.dmg.asc with the file name of the .asc file you downloaded.
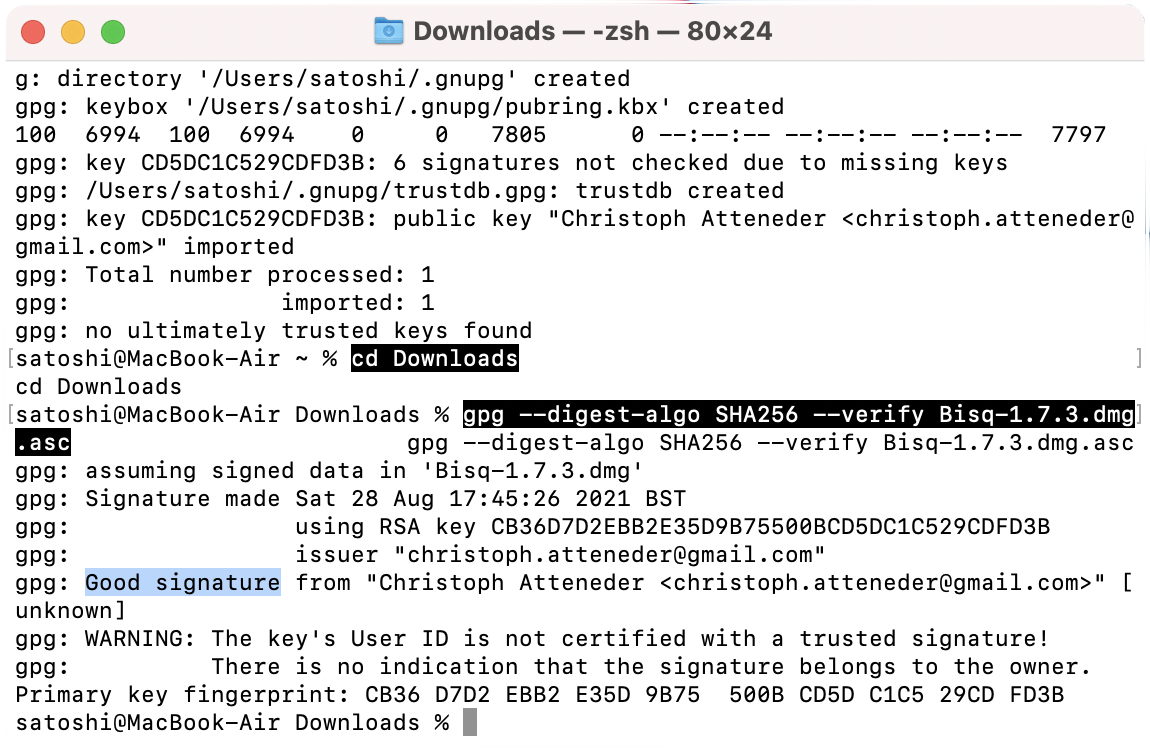
If all is well you should get a message similar to the one above, check that the key fingerprint is correct. Congratulations you have verified that the .dmg file you downloaded is authentic and it is safe to open it, and install Bisq.
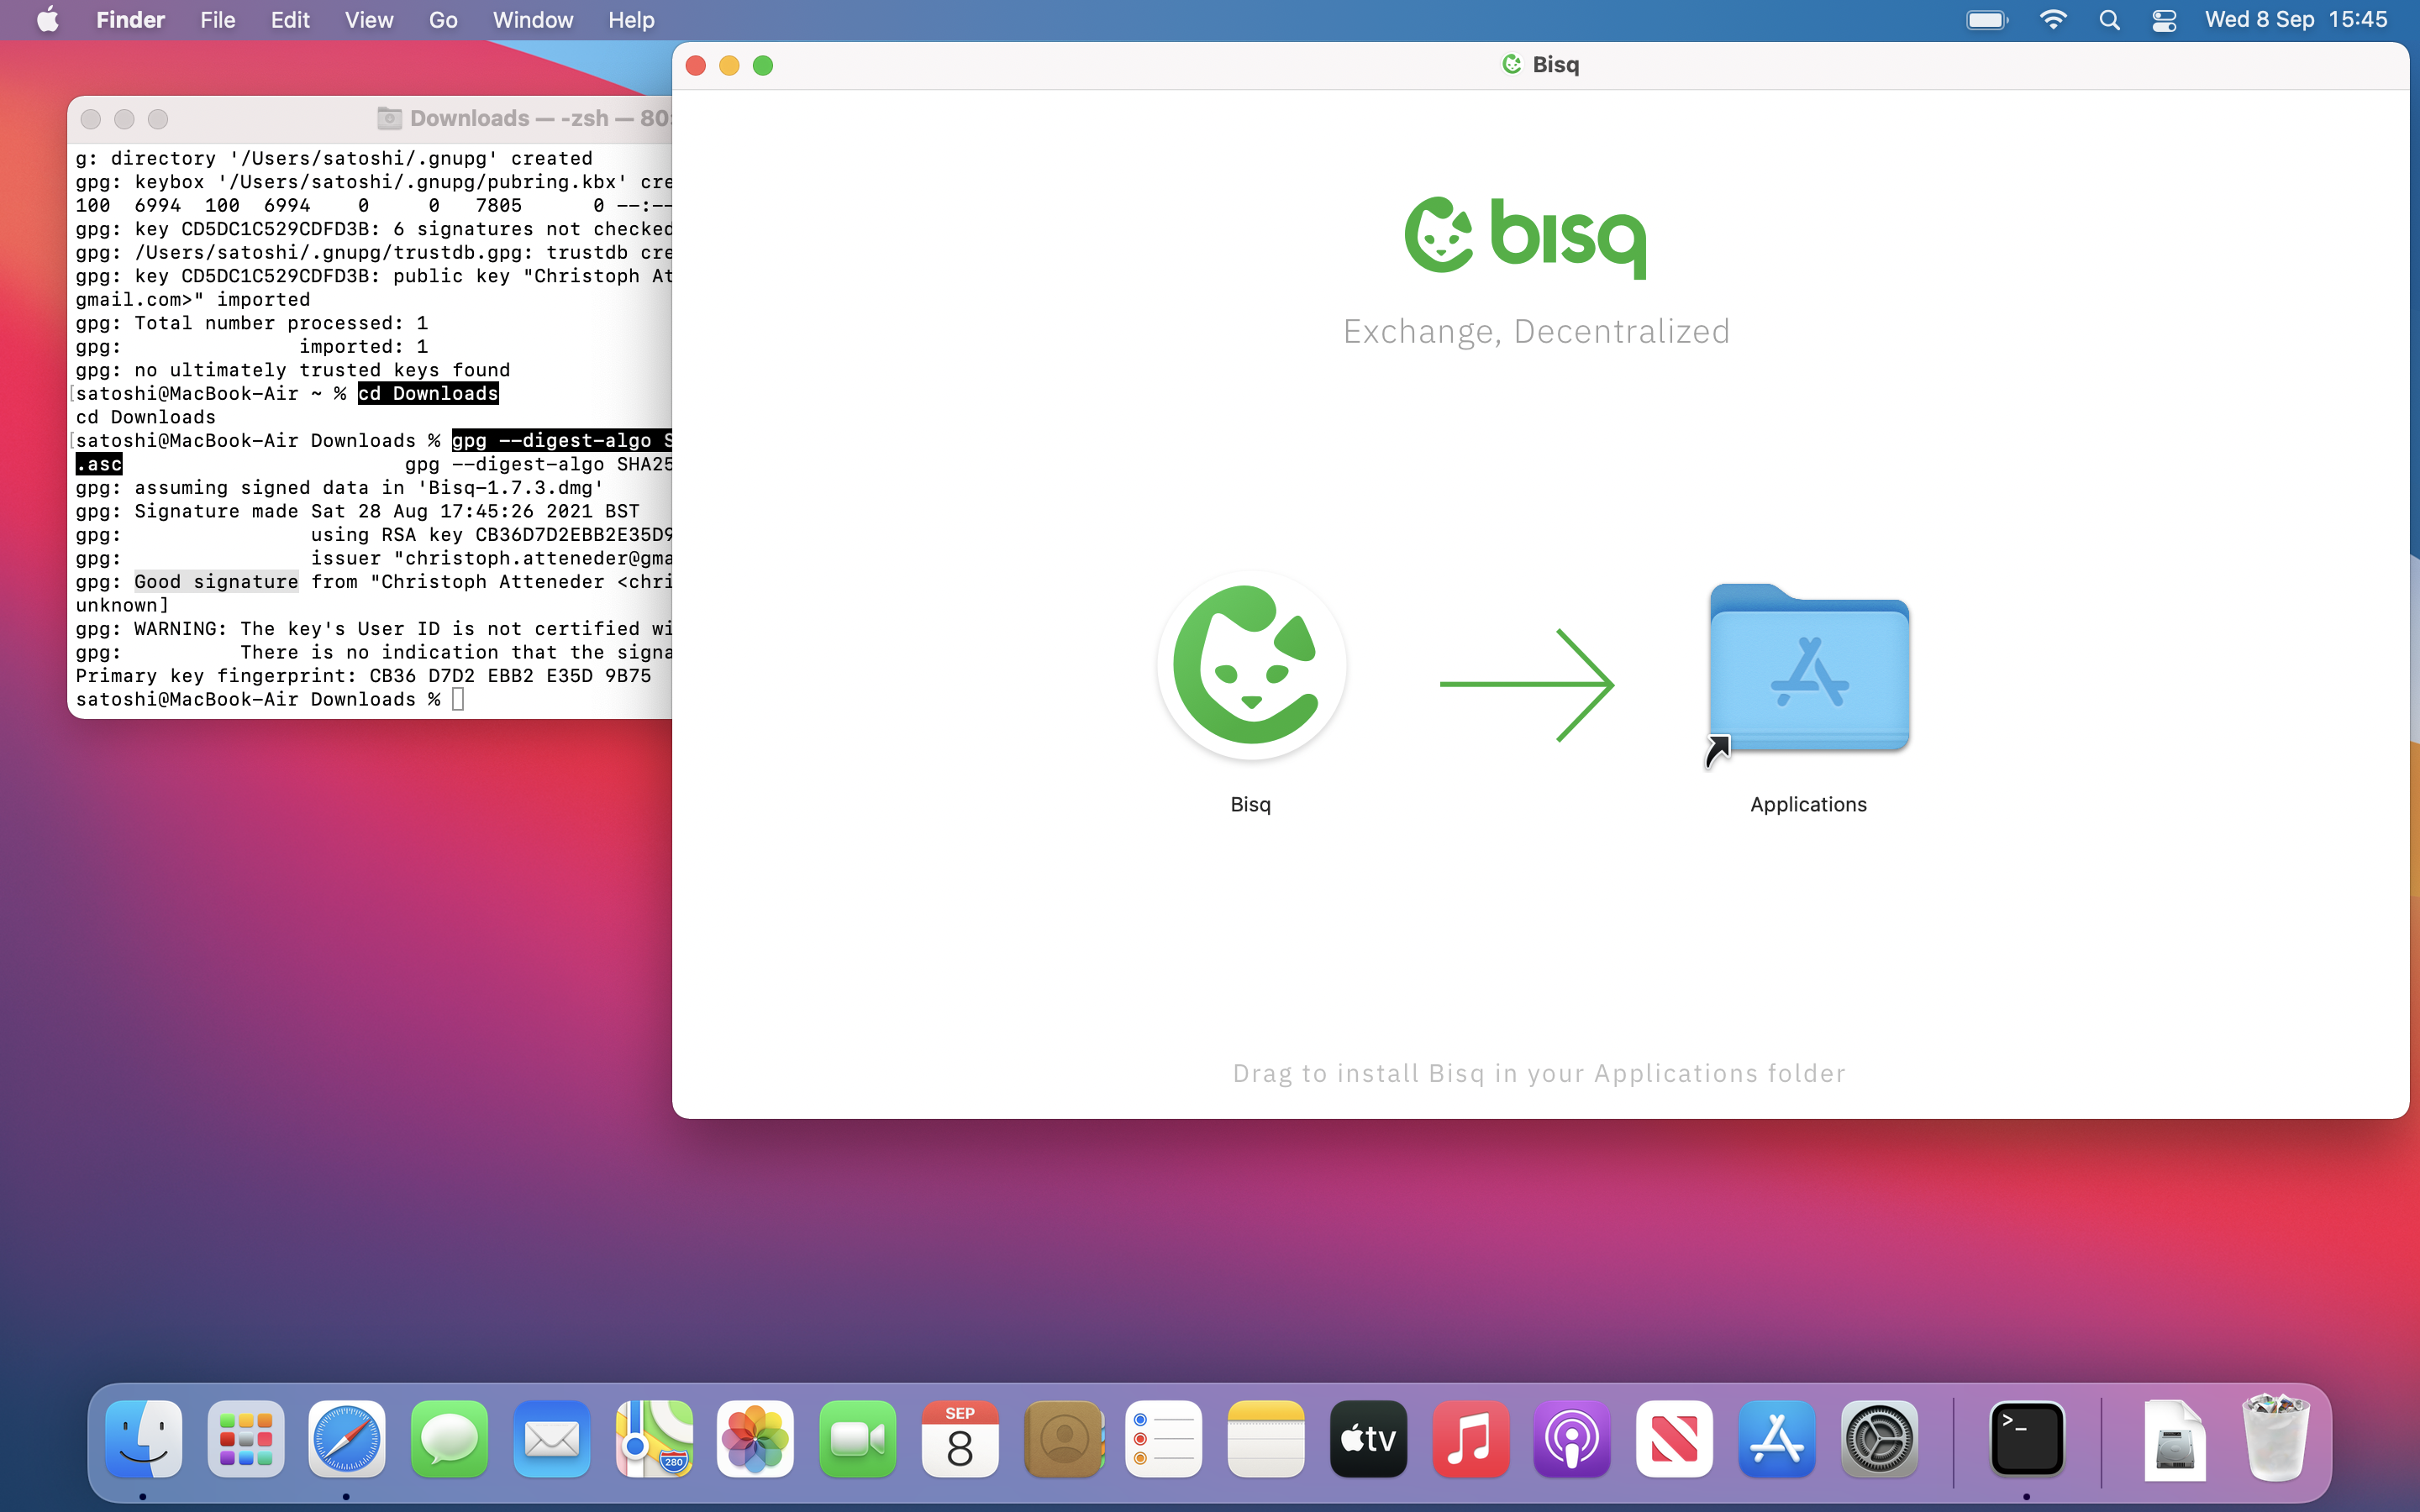
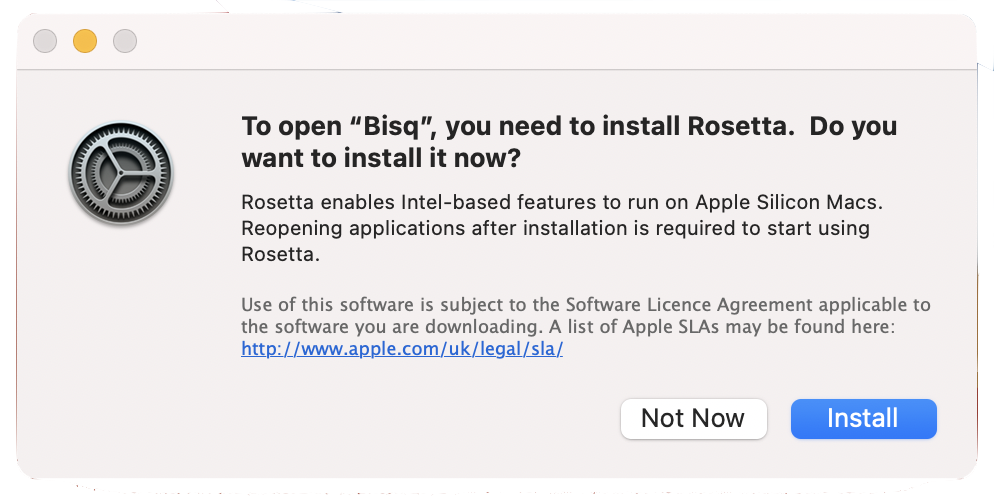
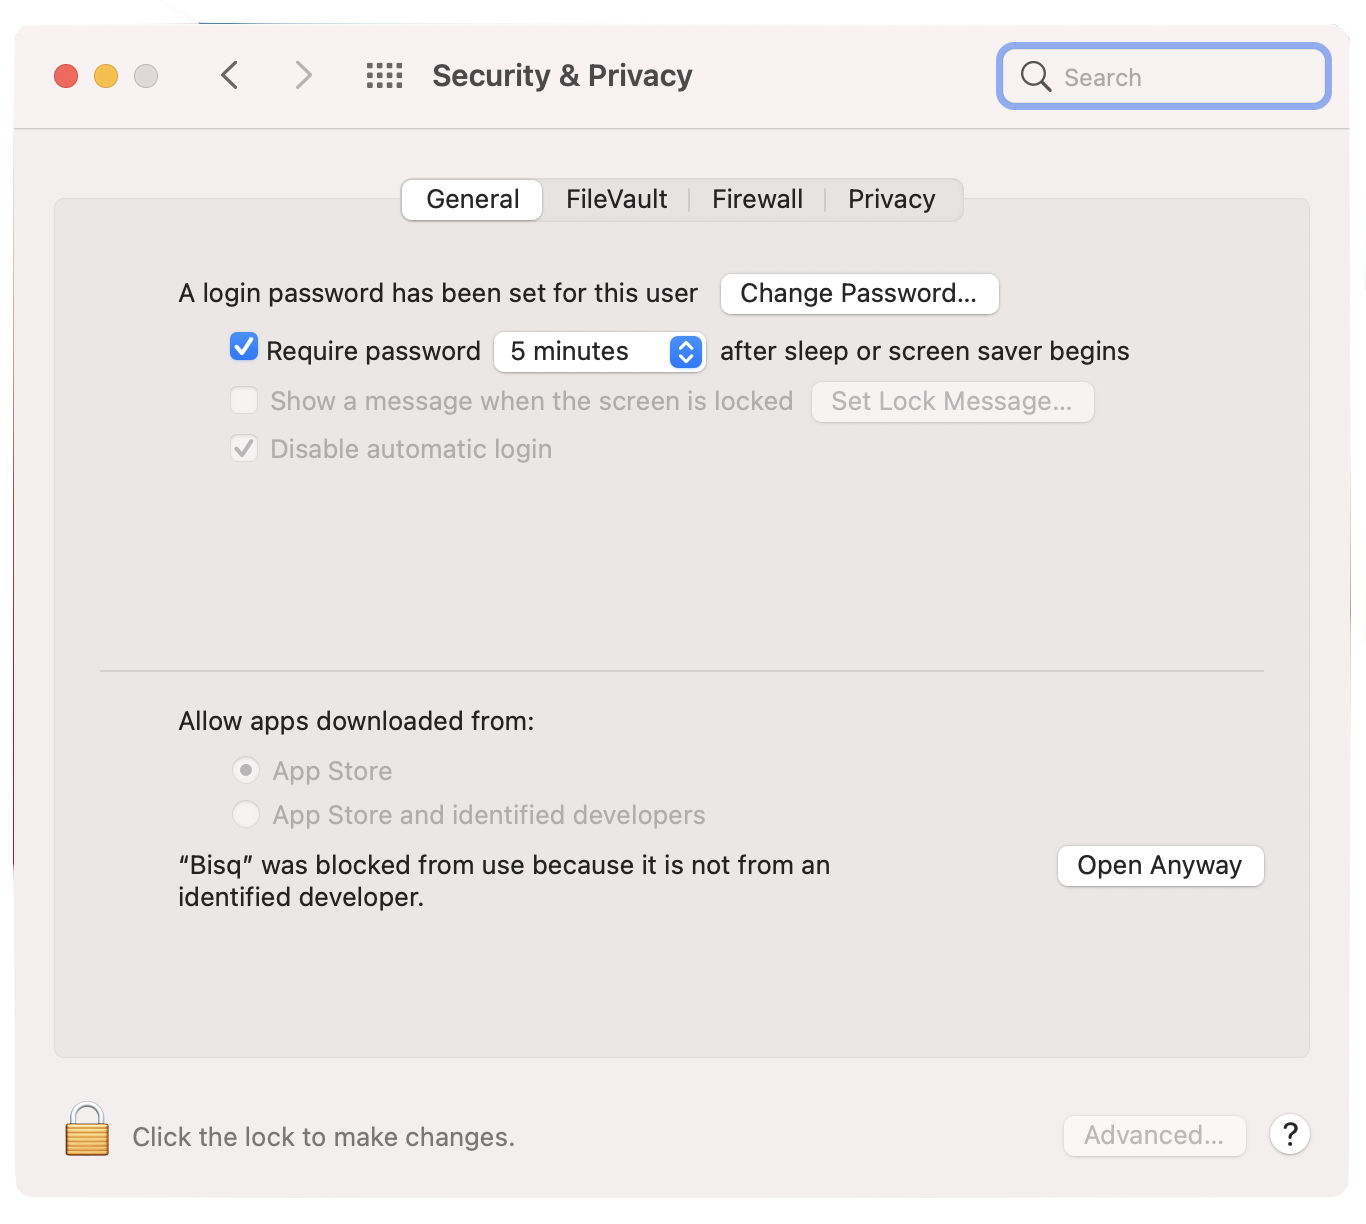
If you are using a newer m1 mac when you open bisq for the first time you may be prompted to install Rosetta if you have not done so before. If you get a message:"Bisq" can't be opened because it was not downloaded from the App Store, open system preferences and go to security and privacy and hit open anyway. You have now installed bisq, you can now eject the bisq volume and delete the .dmg and .asc files.

The first time you open Bisq you should be greeted by a screen like this

Before you make a trade there are several things you should do:
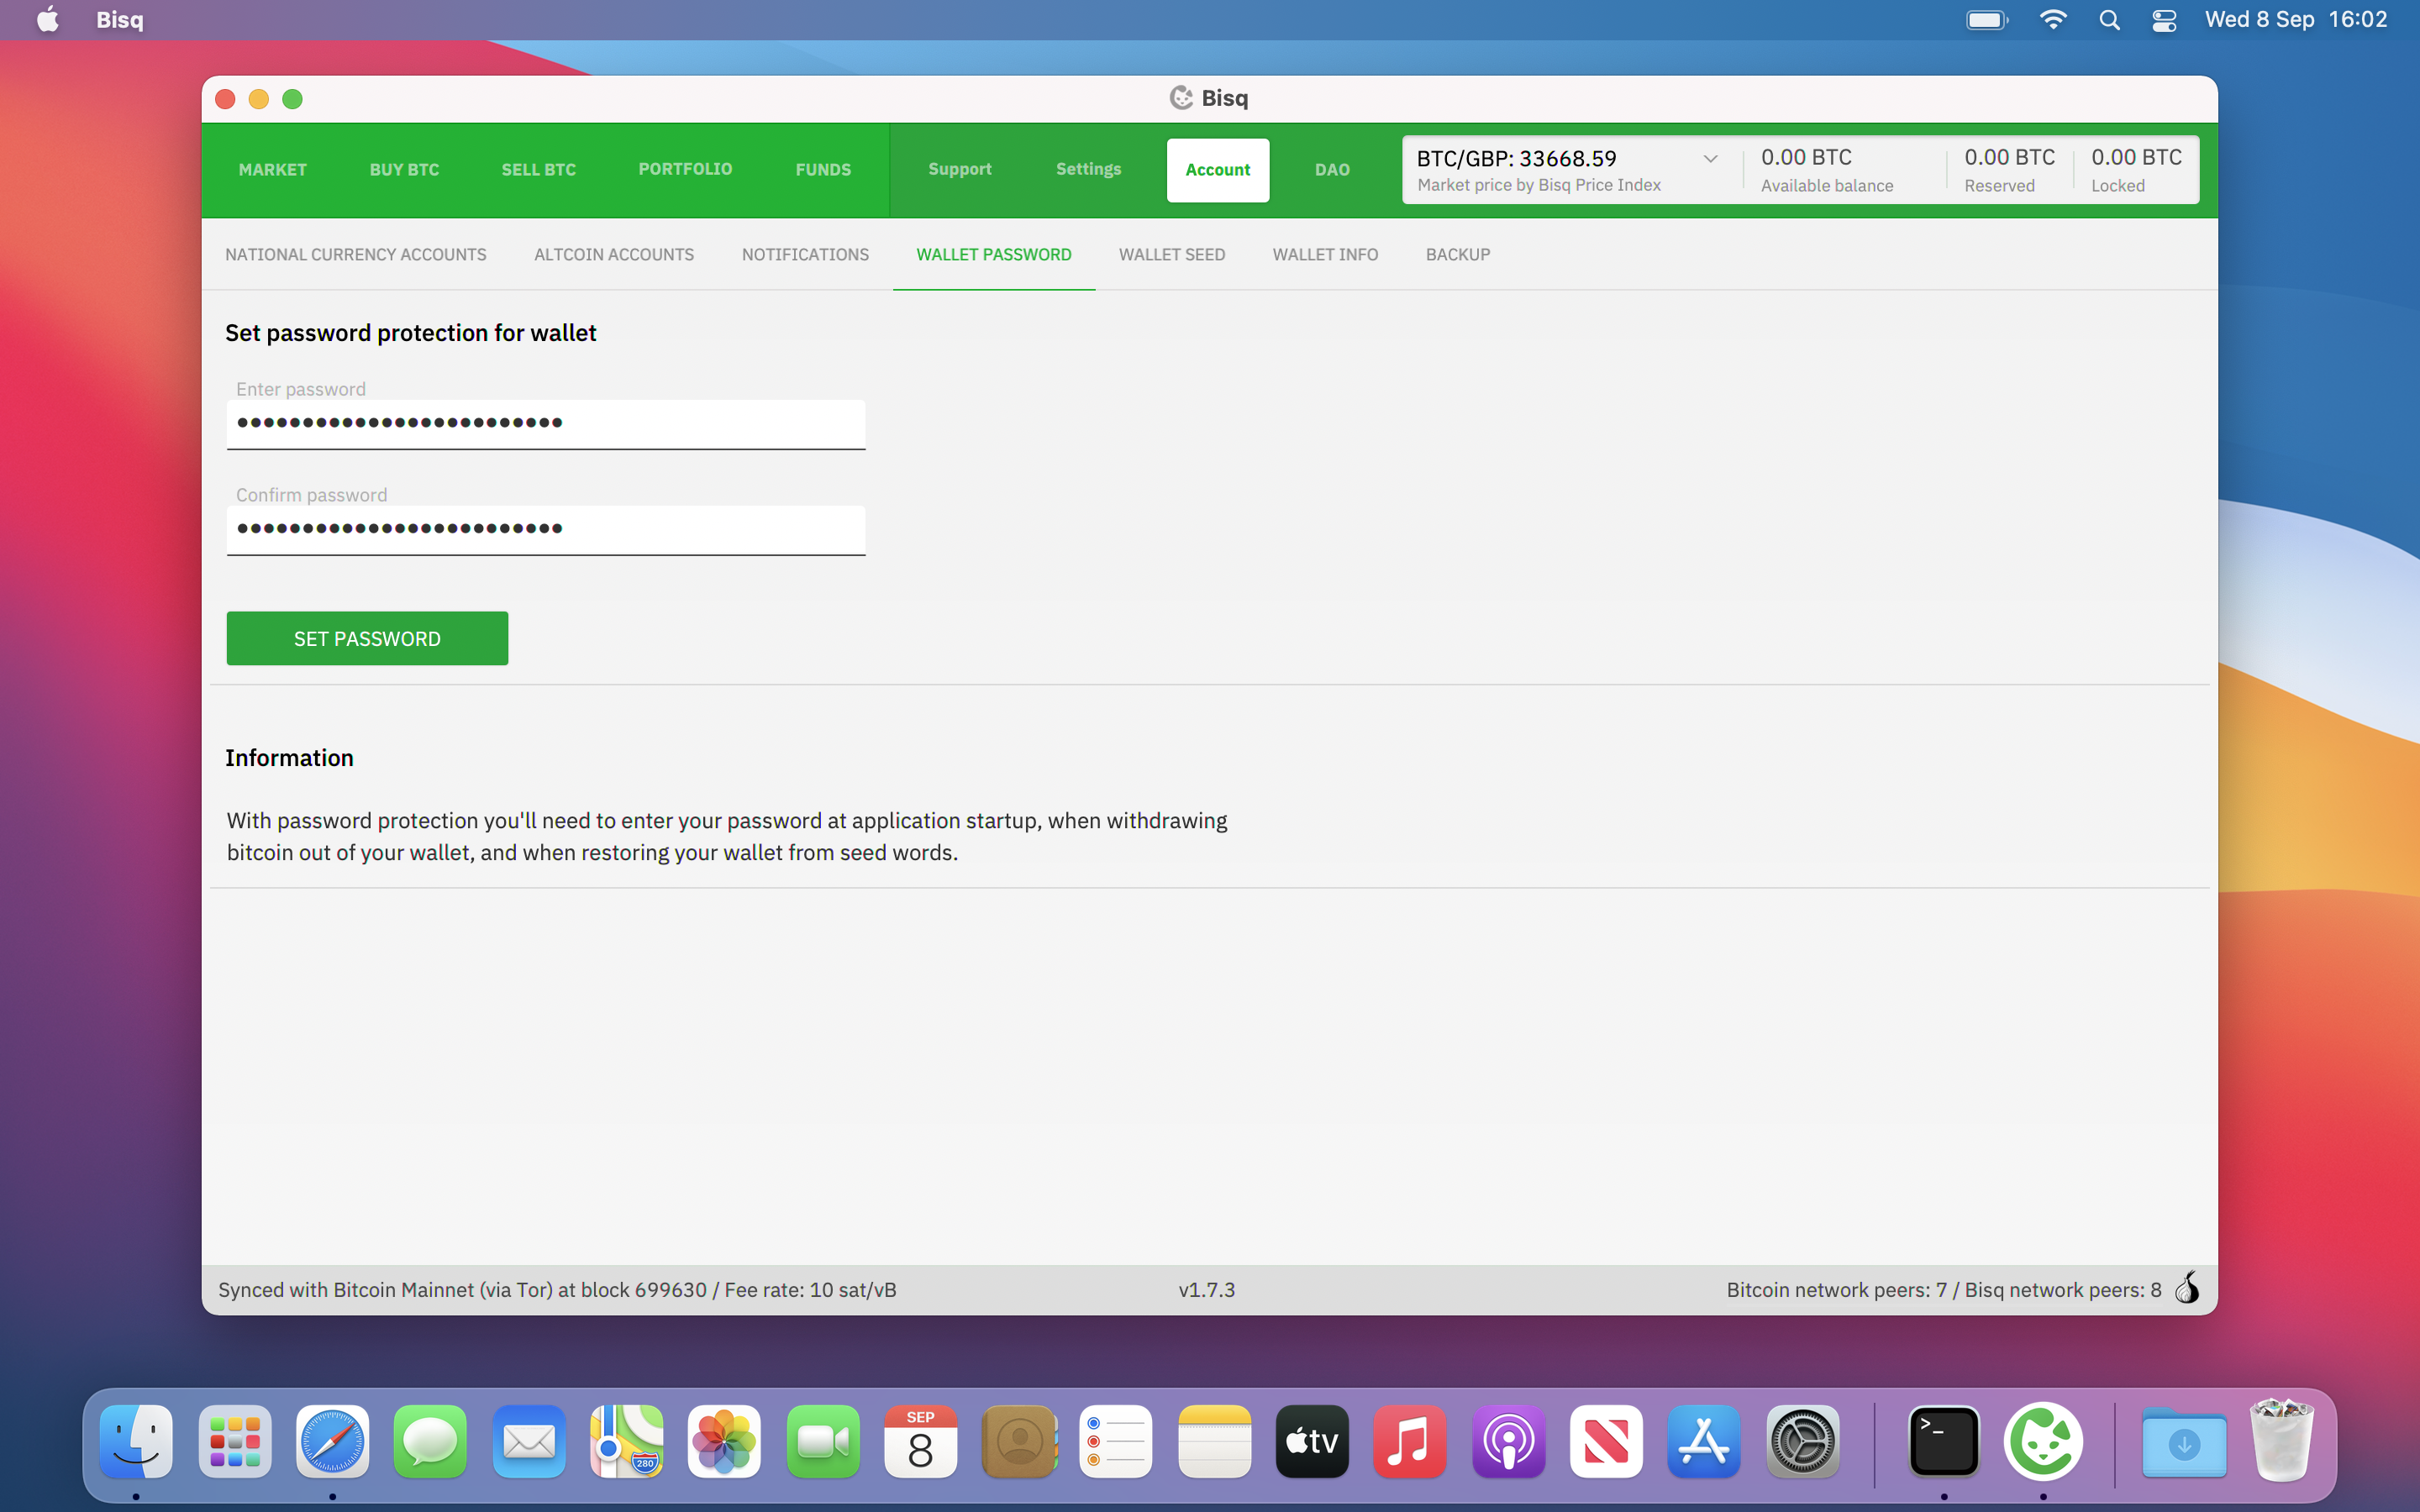
Set a strong password
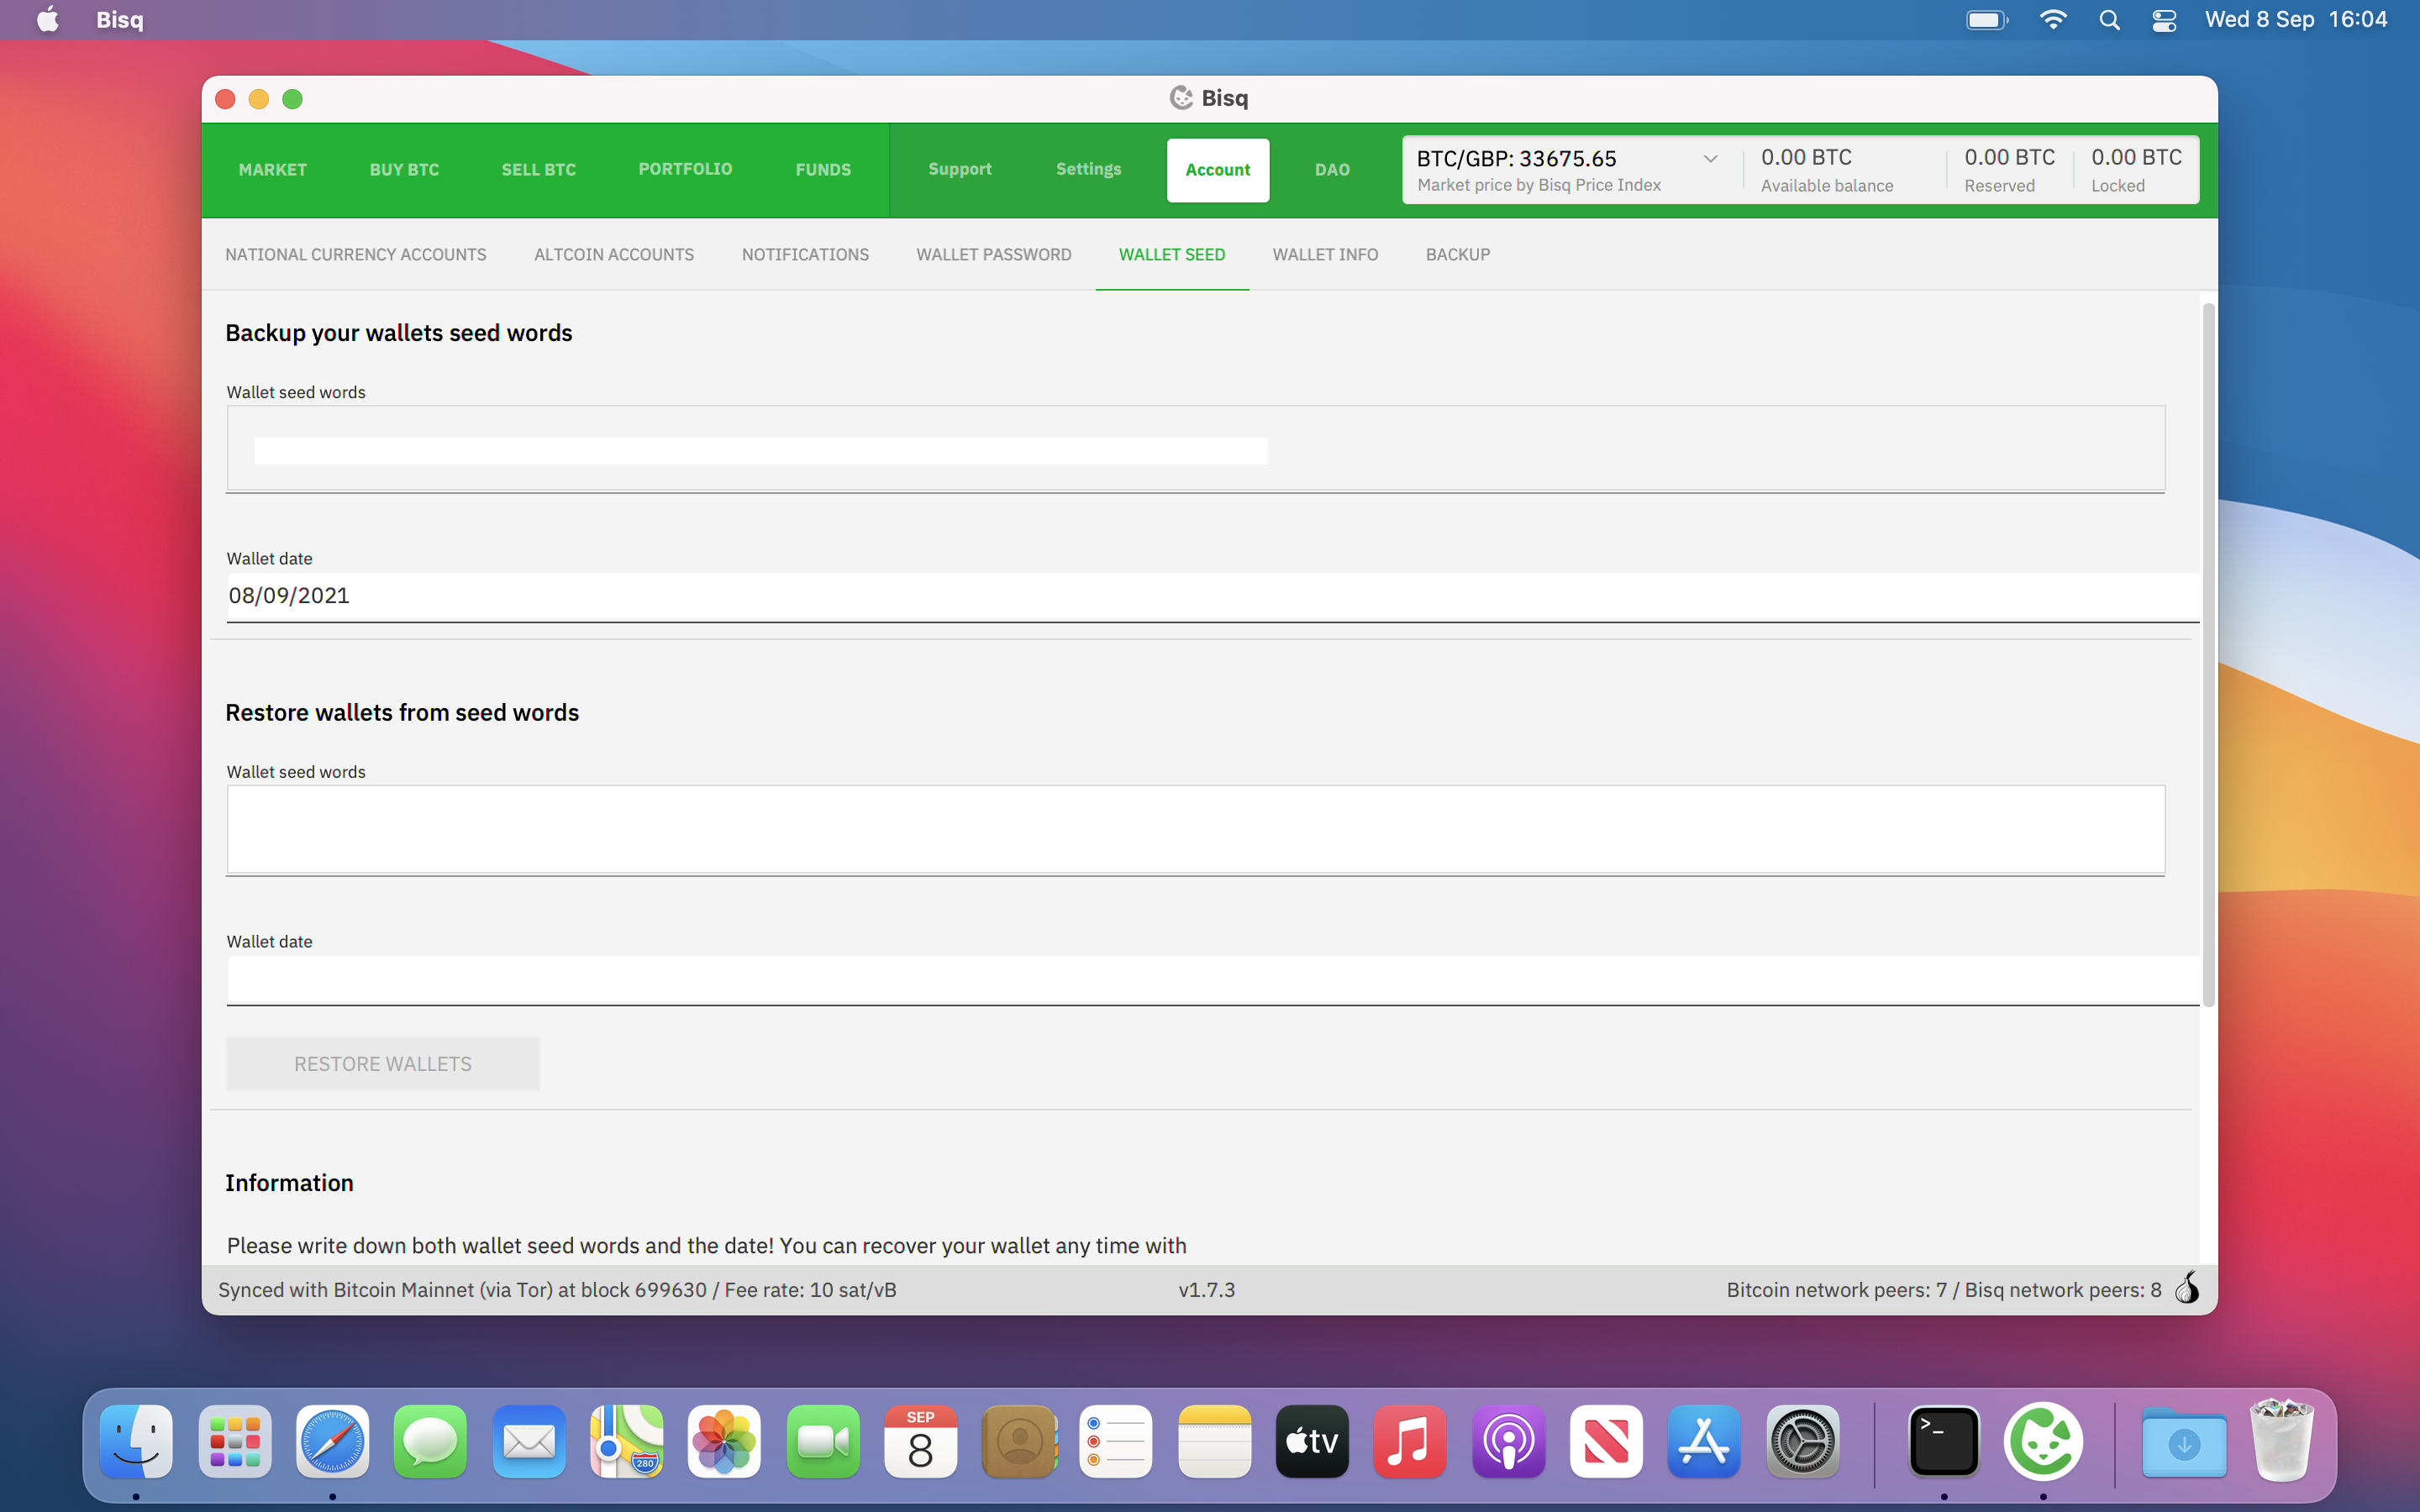
Write down your wallets seed words, these words give access to any funds in your Bisq wallet so keep it secure
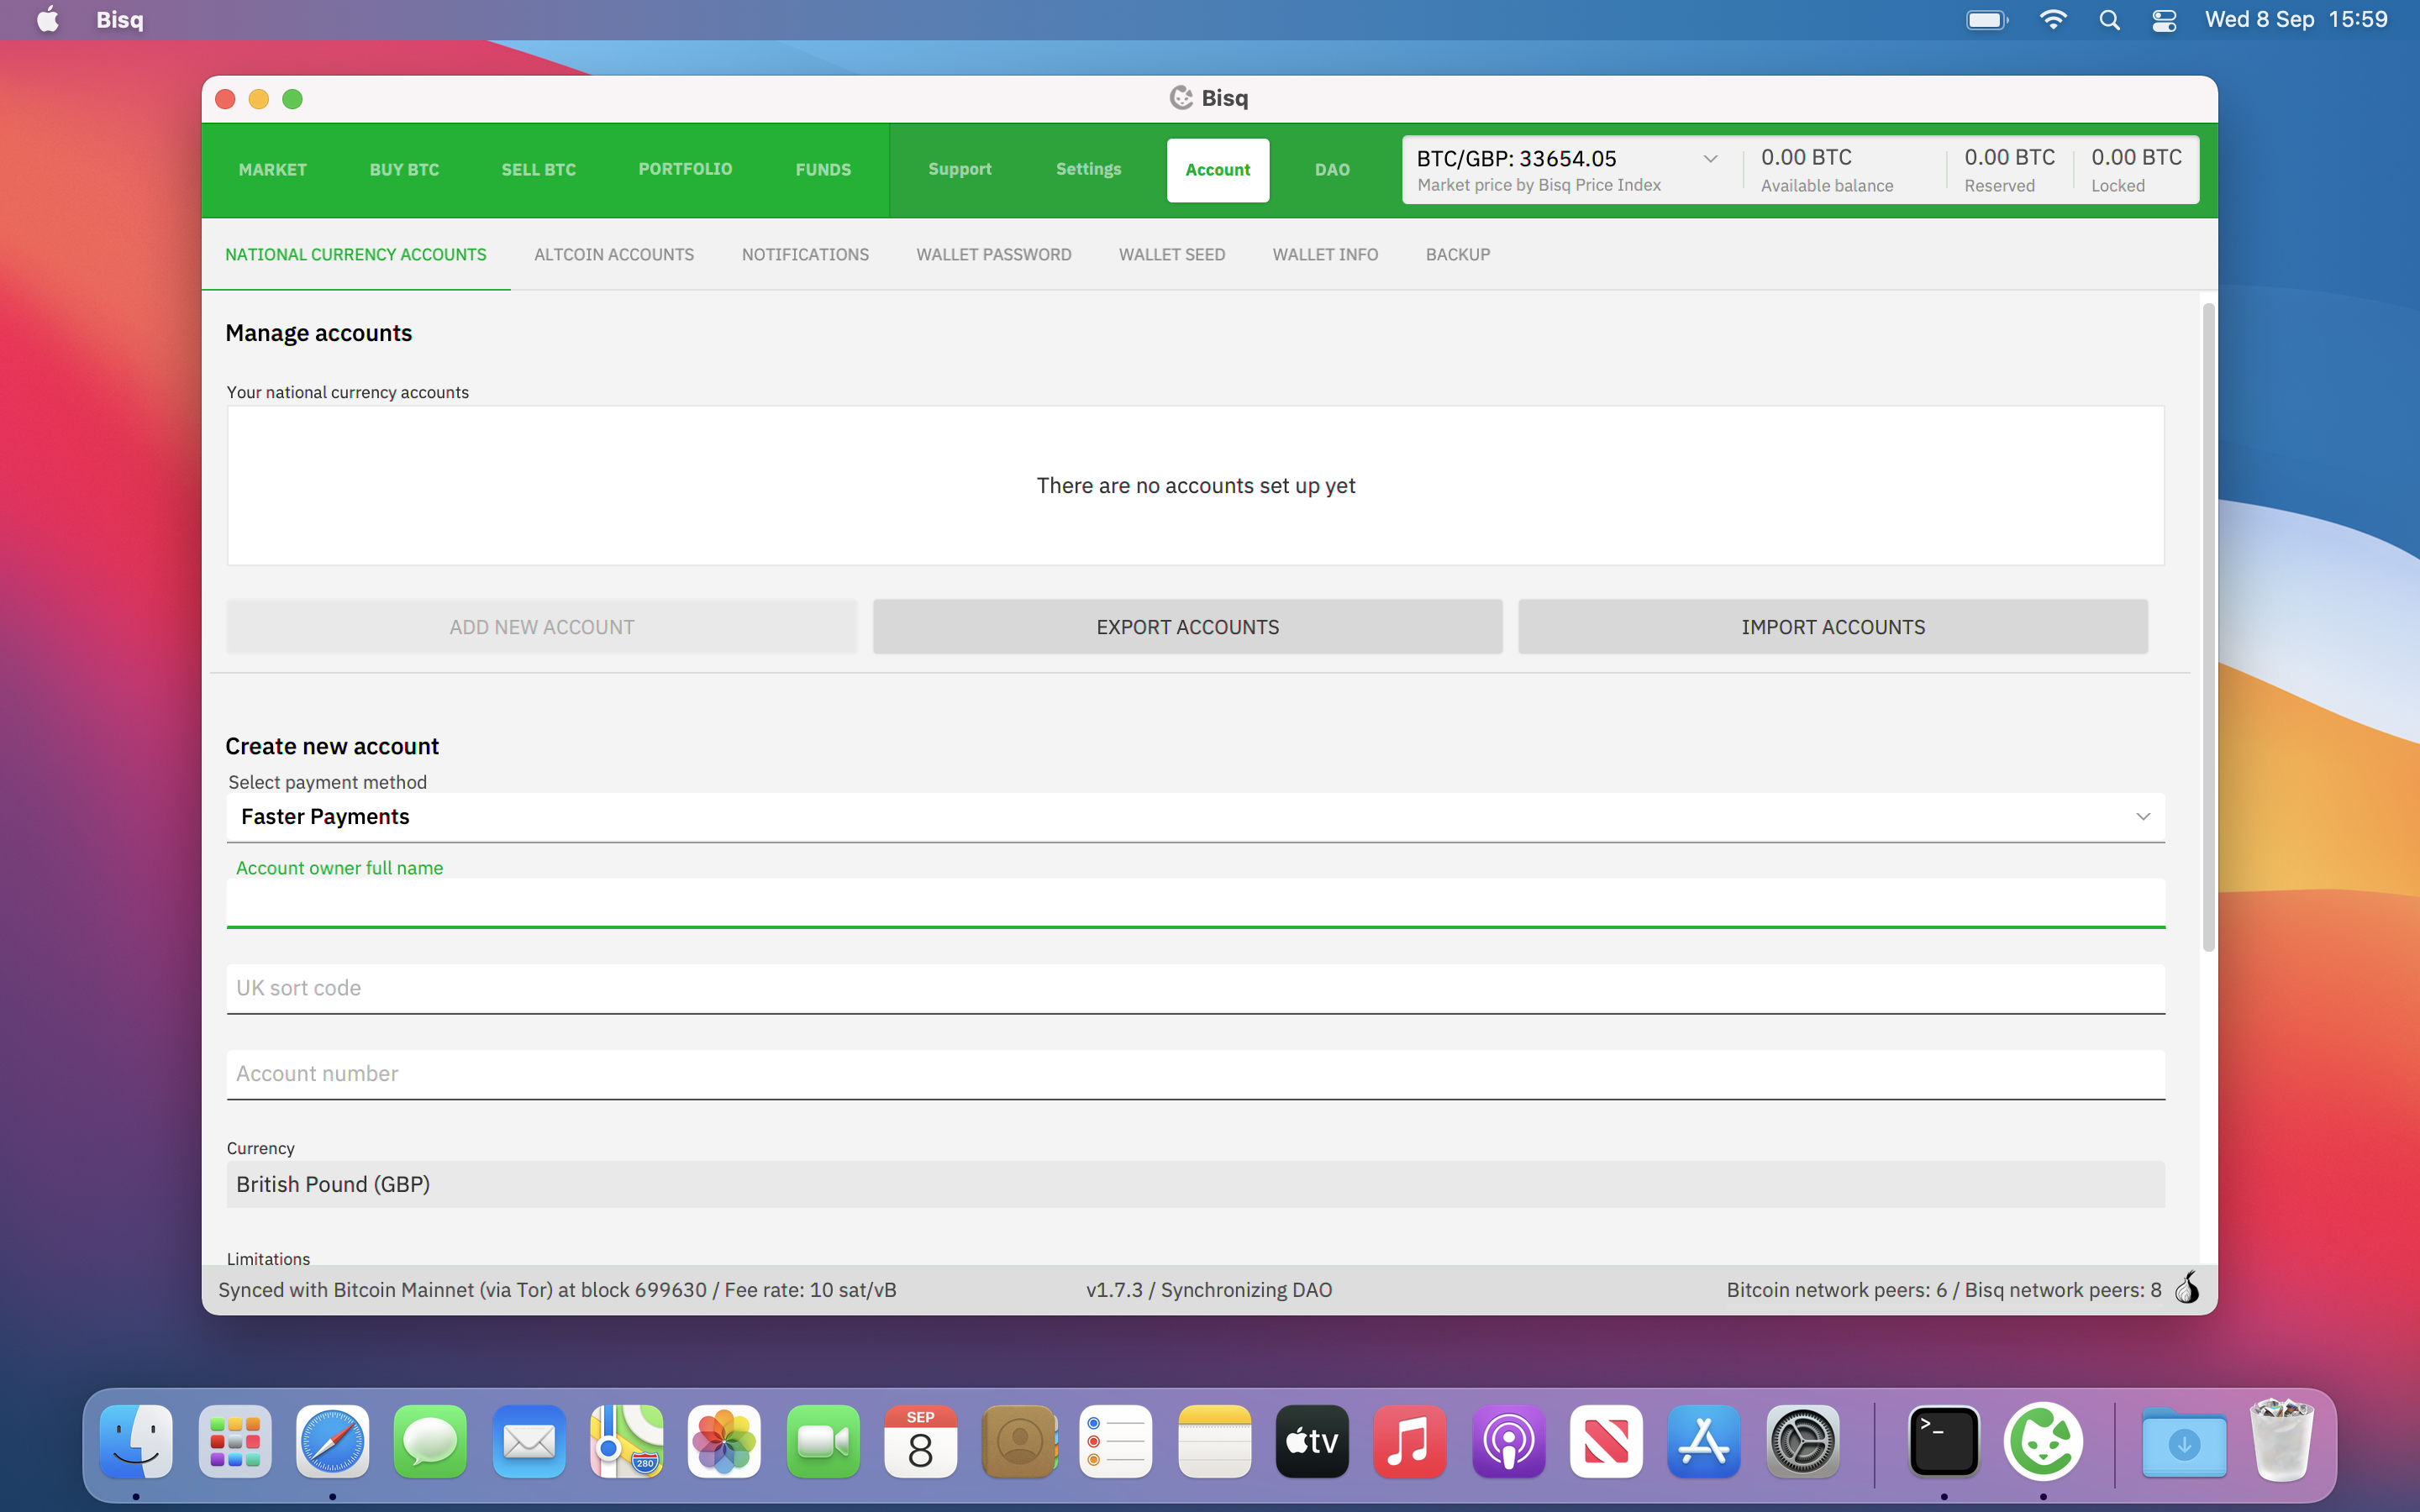
Create a payment account (faster payments is a popular payment method in the uk)
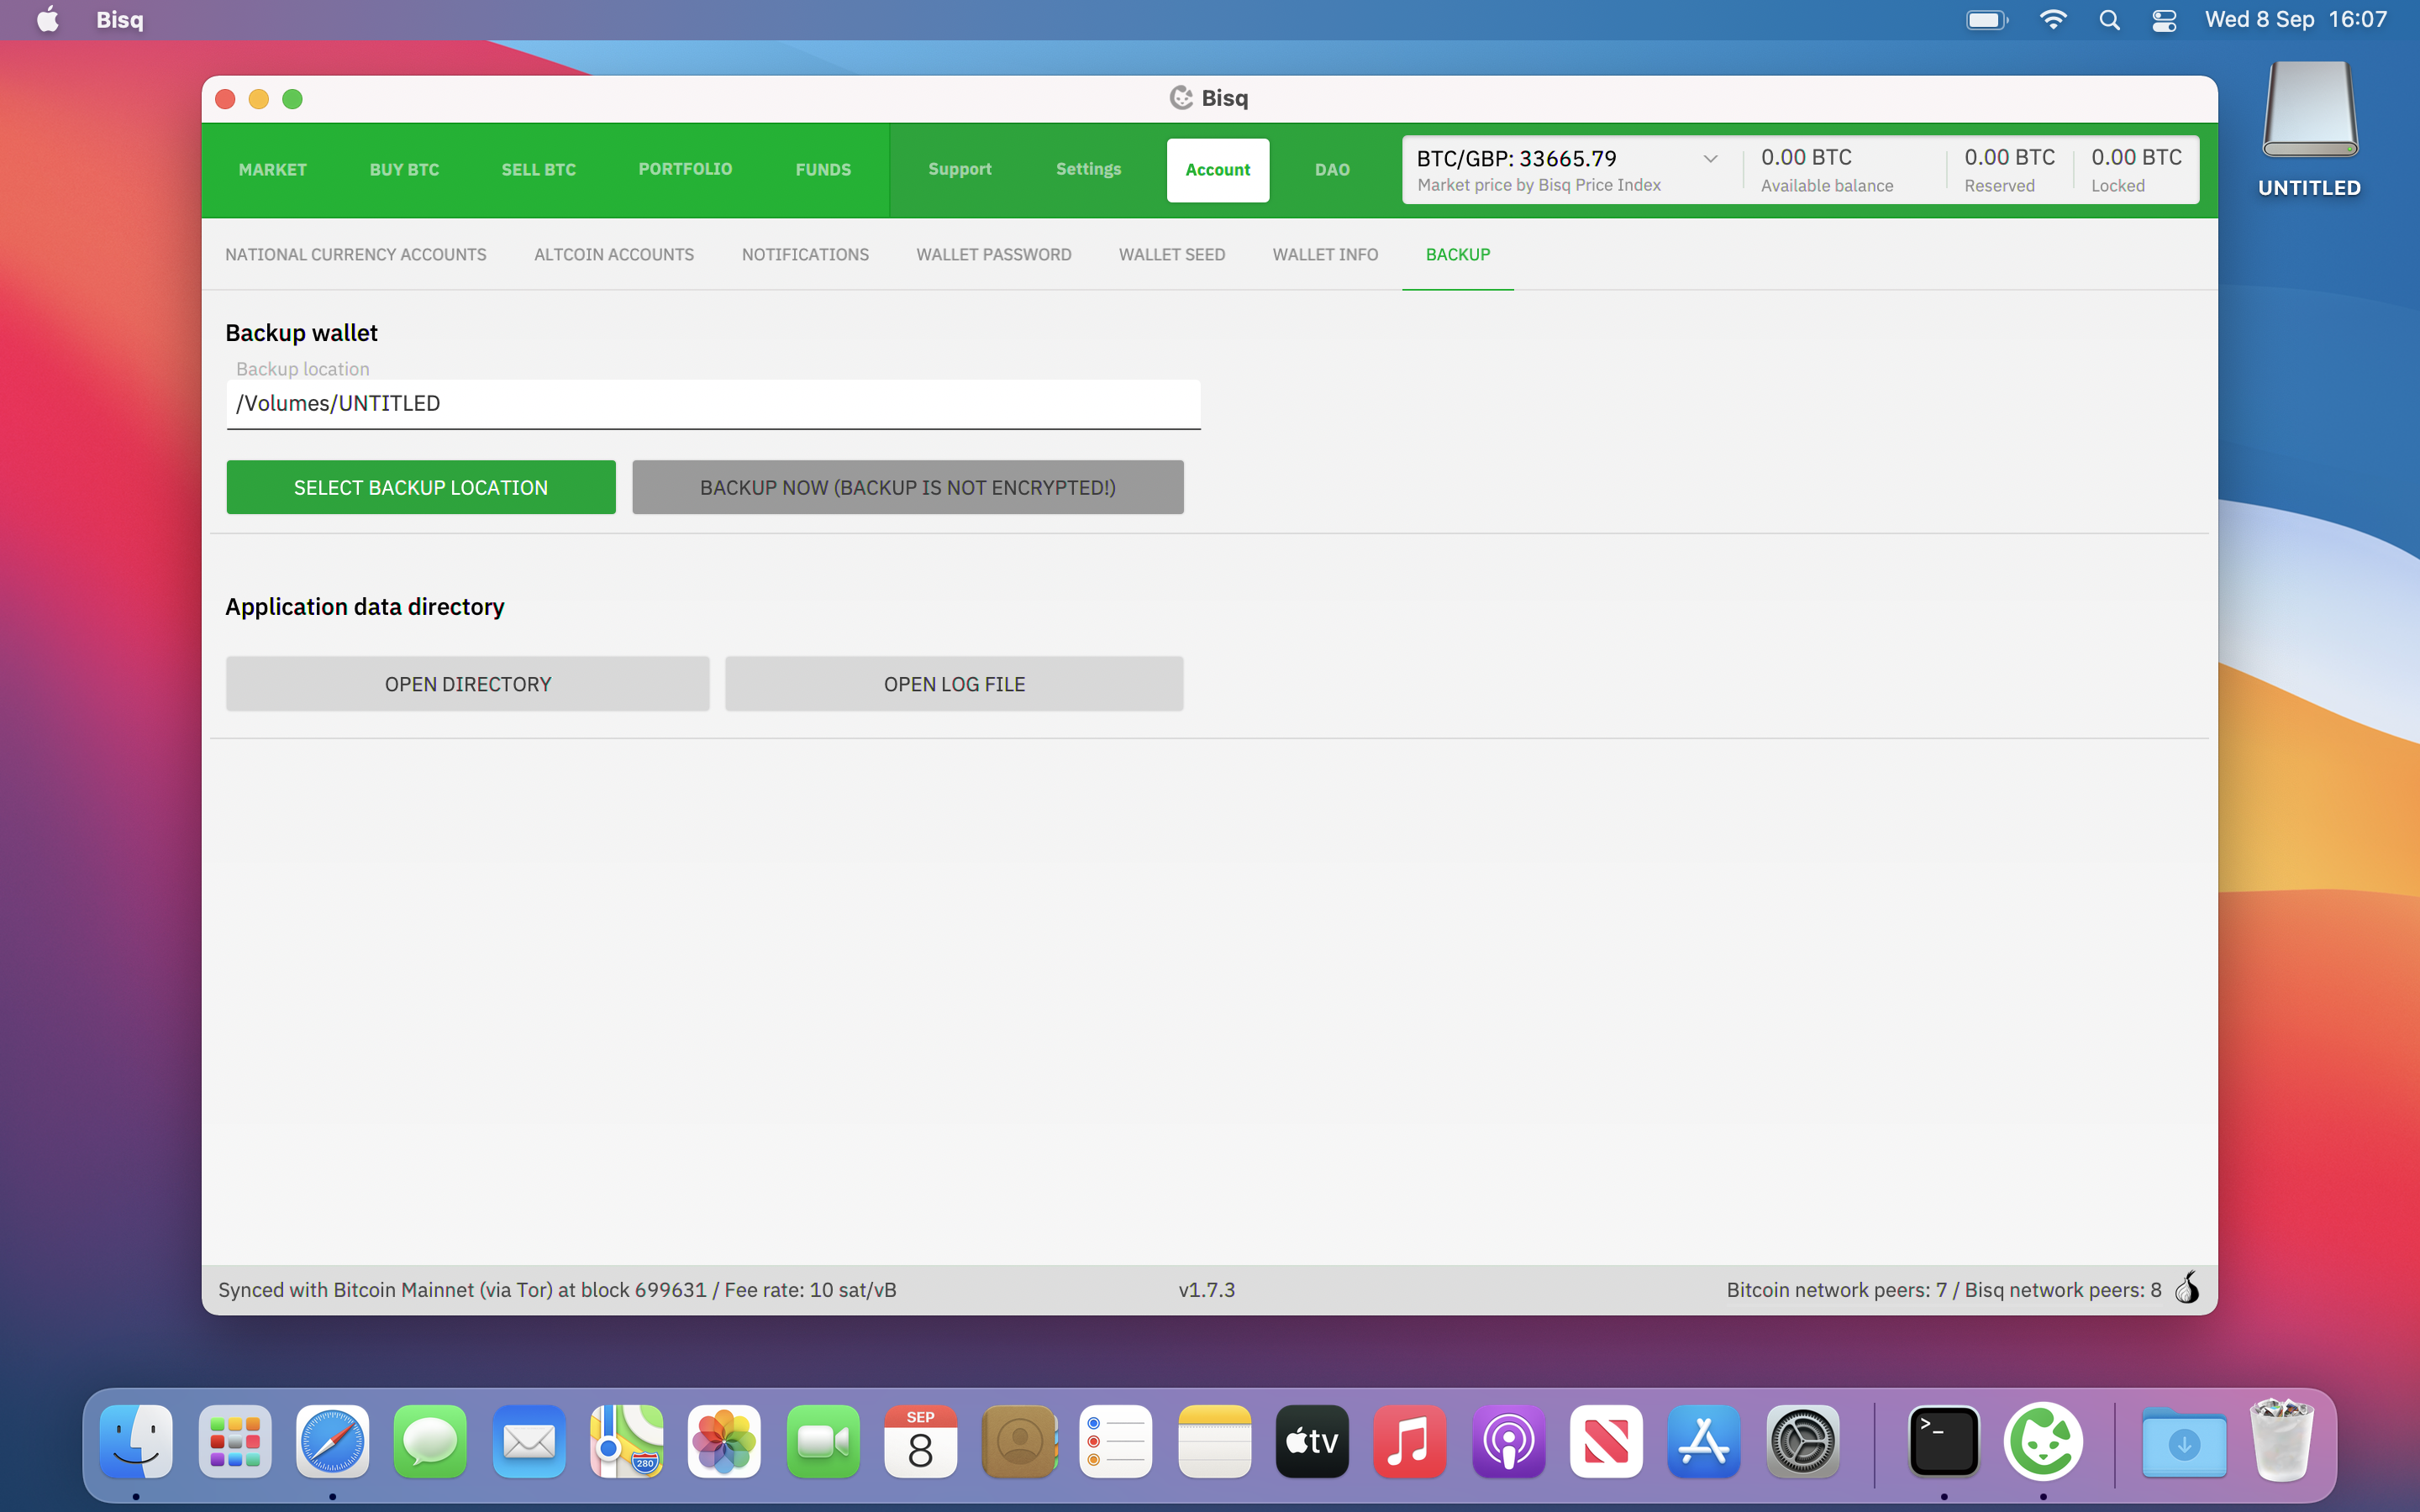
Backup Bisq, this should be done regularly
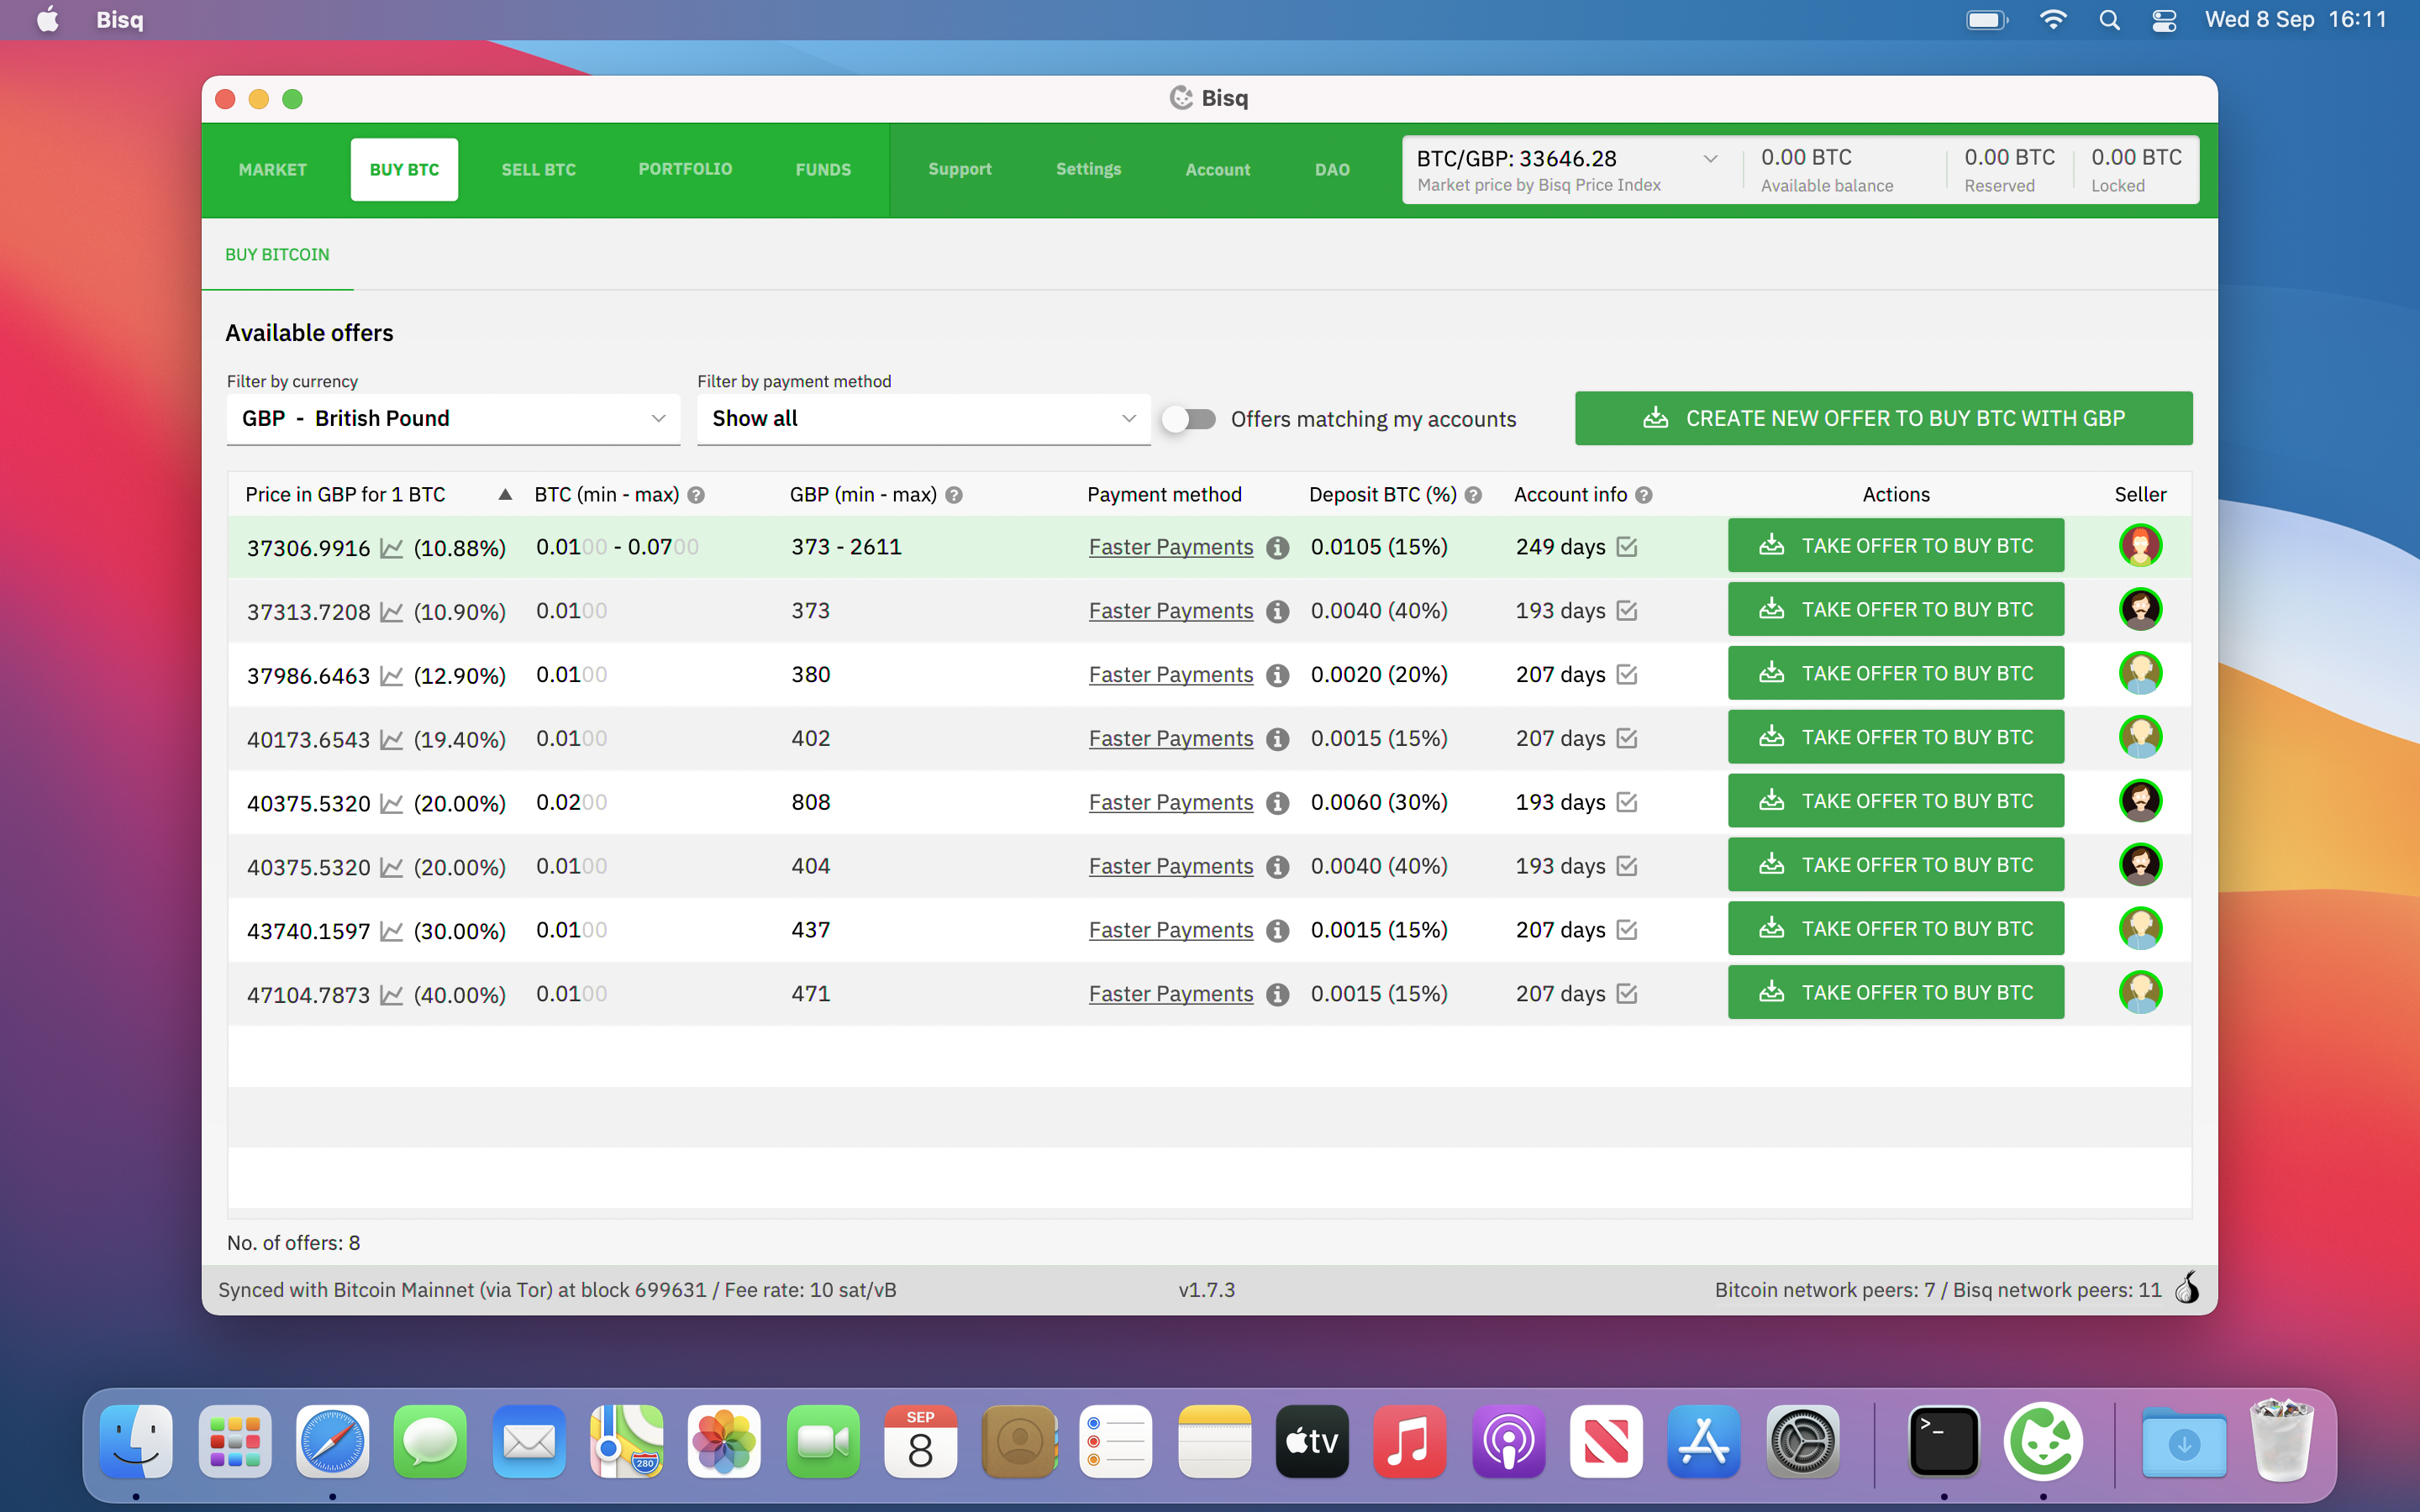
You are now ready to make a trade, you can either take an existing offer or create a new offer, the maker fees are 0.1% and the taker fees are 0.7%. When creating an offer you can set a percentage to deviate from the current market price, so it often pays to be patient and create your own offer.
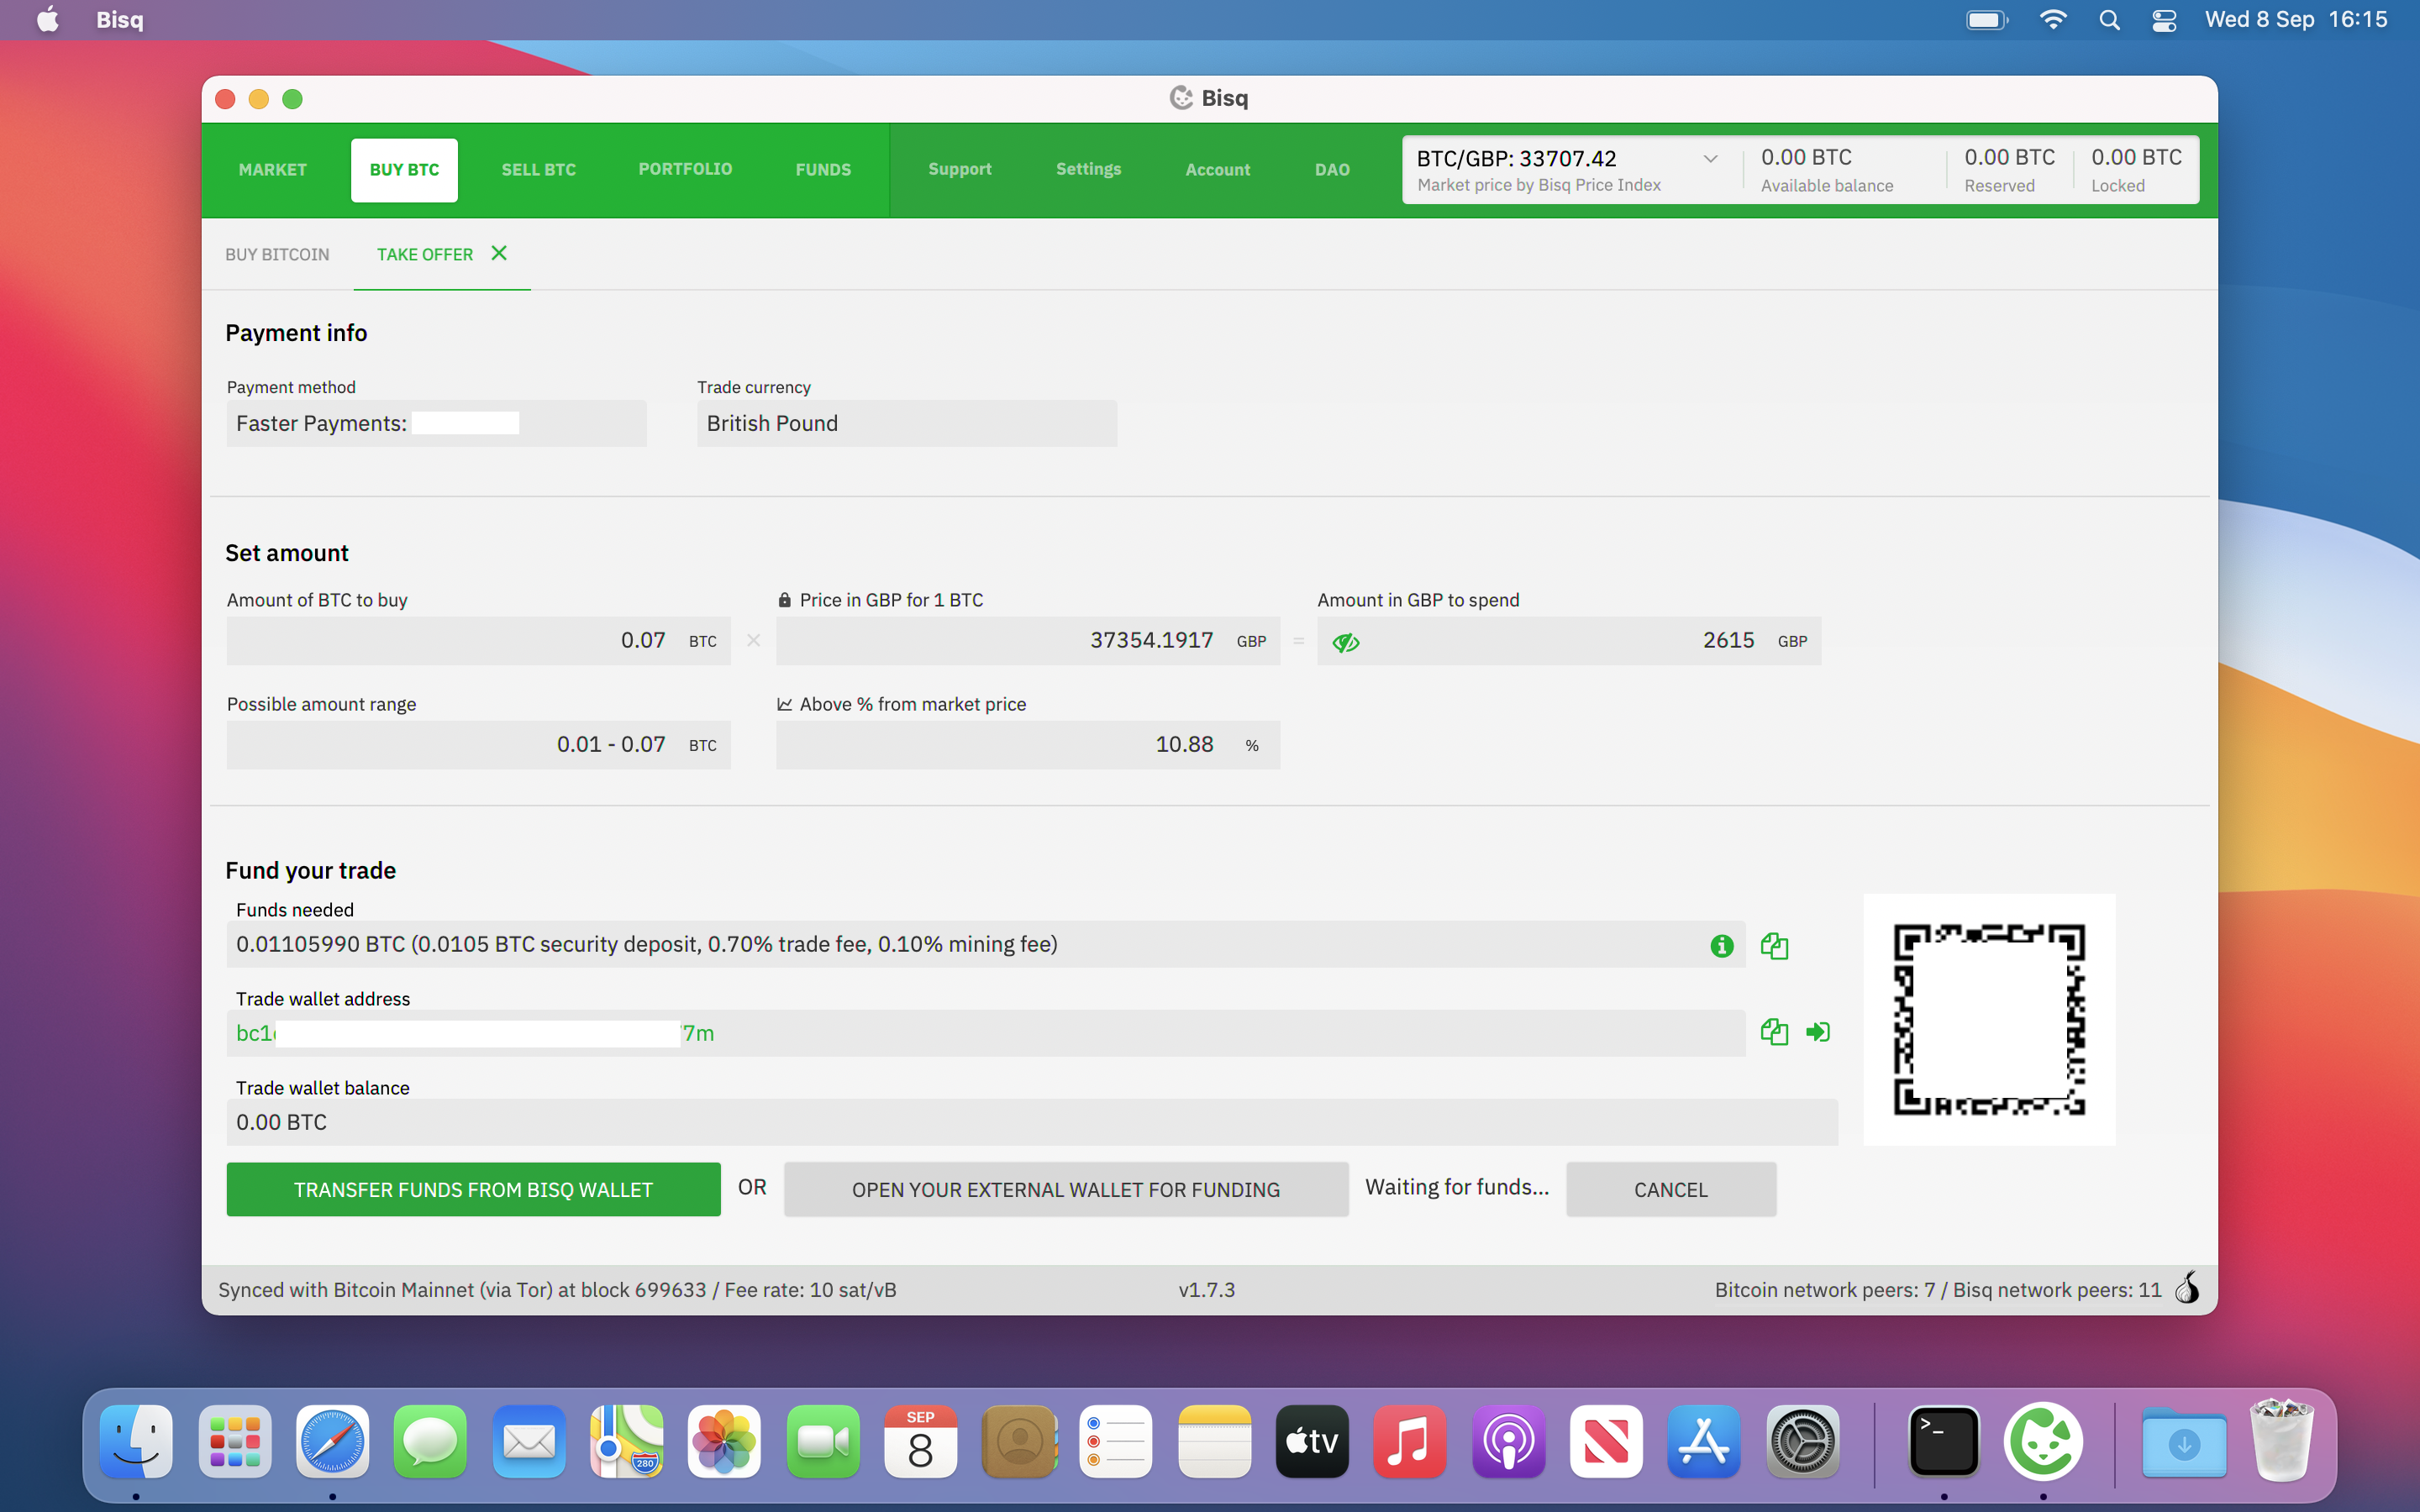
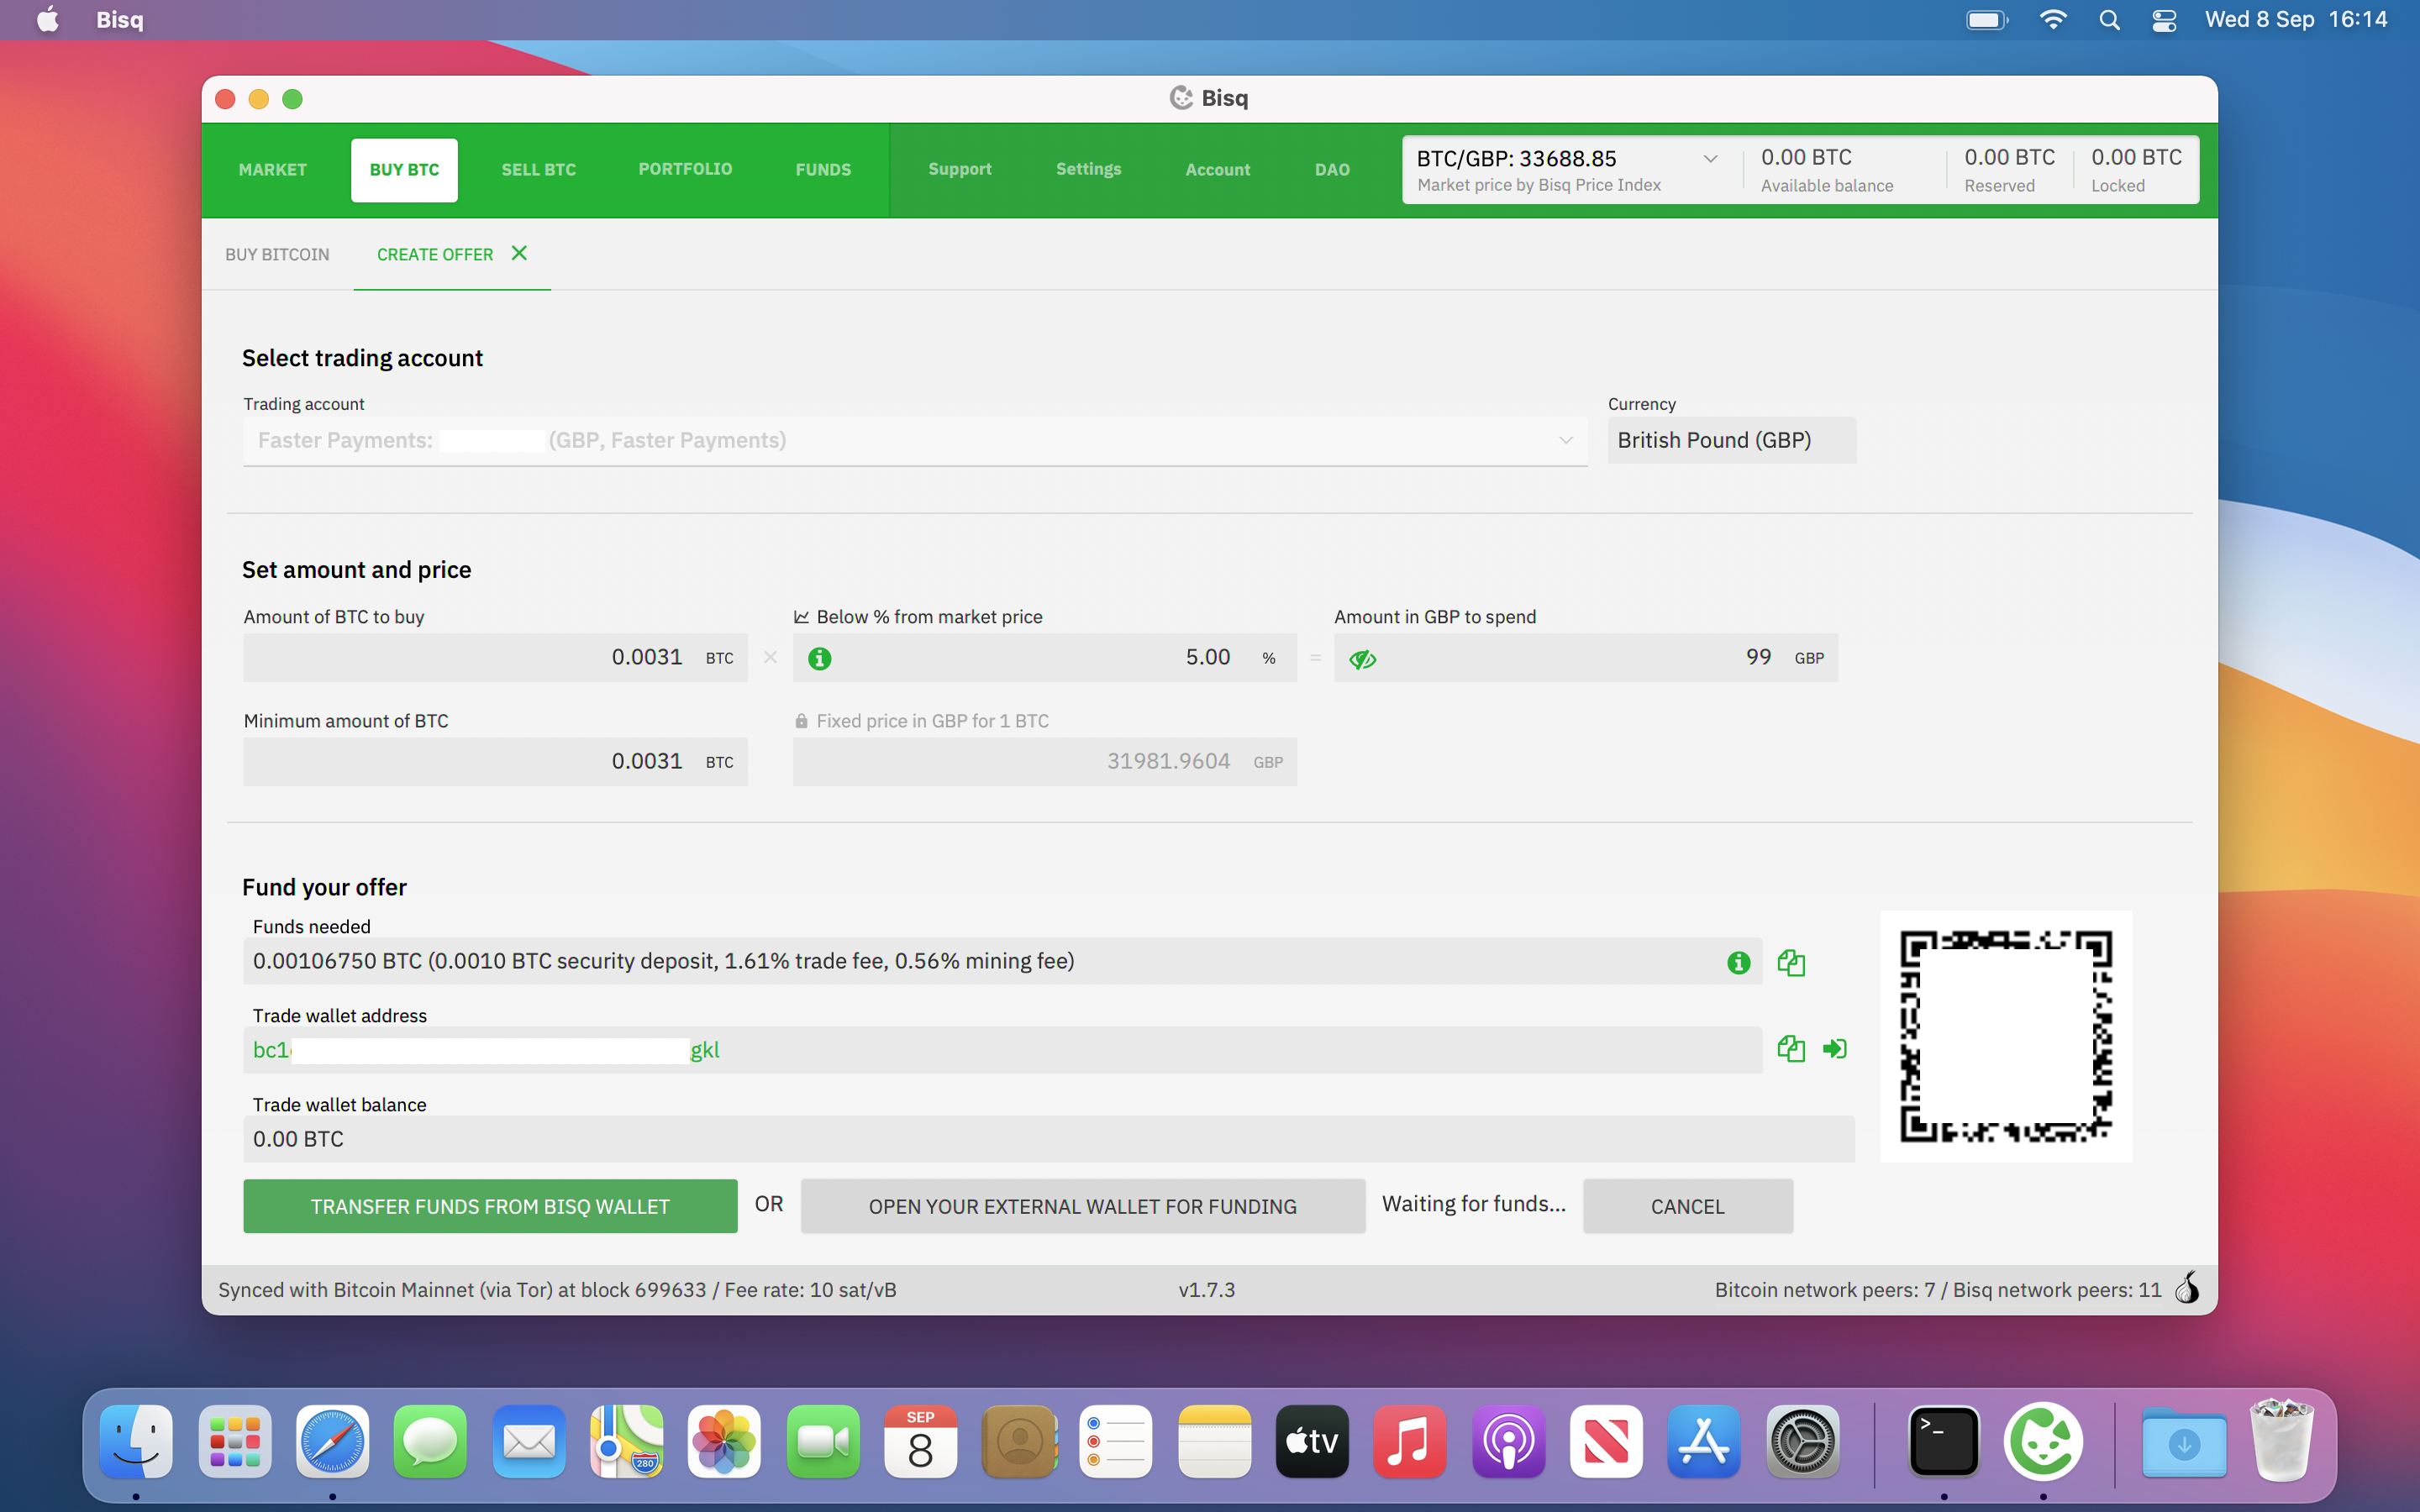
As you can see from the images above you need to "Fund your offer", this is to pay for the trading fee and the security deposit (more on this later). This is awkward as you need bitcoin to be able to buy bitcoin, you could buy some bitcoin off a friend or use a bitcoin atm.
Some upcoming features I got from this video.